Prep Time: 20 minutes | Cook Time: 45 minutes | Total Time: 1 hour 5 minutes
Difficulty: Easy | Yield: 6-8 half-pint jars
Table of Contents
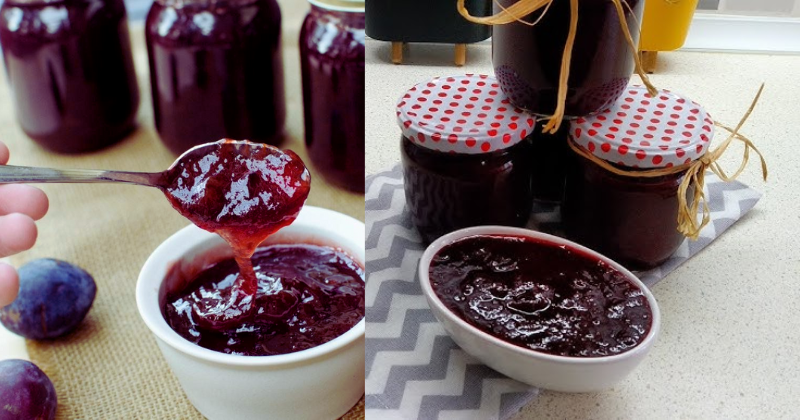
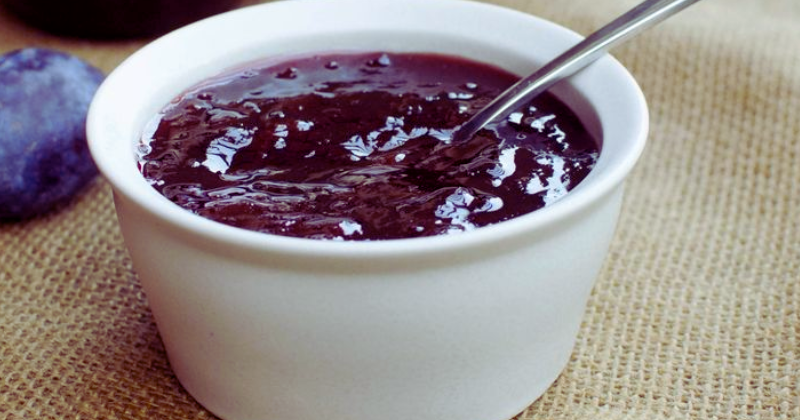
There’s something magical about the moment you open a jar of homemade plum jam in the dead of winter. The sweet, tangy aroma instantly transports you back to lazy summer afternoons, when purple-stained fingers and the gentle bubbling of jam on the stove filled your kitchen with warmth. My grandmother taught me to make plum jam during one of those golden August weeks when her ancient plum tree was heavy with fruit, and every year since, I’ve carried on this cherished tradition. This homemade plum jam recipe captures that perfect balance of sweet and tart that makes store-bought versions pale in comparison. Whether you’re a seasoned canner or a complete beginner, this easy plum jam will become your go-to preserve for transforming fresh plums into liquid sunshine that lasts all year long.
Why You’ll Love This Plum Jam Recipe
This isn’t just another jam recipe – it’s your ticket to preserving summer’s bounty while creating something truly special for your family. First, this easy homemade plum jam requires just four simple ingredients, making it incredibly approachable for beginners while delivering restaurant-quality results. The natural pectin in plums means you’ll achieve that perfect, spreadable consistency without artificial additives or complicated techniques. Second, you’ll save money compared to premium artisanal jams while controlling exactly what goes into your family’s food – no high fructose corn syrup or artificial preservatives here. Third, this recipe is incredibly versatile, working beautifully with any plum variety and adapting easily to your taste preferences, whether you like it sweeter or more tart. Finally, there’s nothing quite like the satisfaction of gifting homemade jam to friends and neighbors, sharing a jar of summer sunshine that shows you truly care about the people in your life.
Ingredient Insights & Selection Guide
The beauty of plum jam lies in its simplicity, but choosing the right ingredients makes all the difference in your final product. Fresh plums are the star of the show – look for fruit that’s ripe but still firm, with a slight give when gently pressed. A mix of varieties creates the most complex flavor profile; I love combining sweet Italian prunes with tart Santa Rosa plums. If your plums are very ripe and soft, reduce the cooking time slightly to prevent mushiness. Granulated white sugar isn’t just for sweetness – it acts as a natural preservative and helps achieve proper gel consistency. You can substitute up to one-third of the sugar with honey for a more complex flavor, though this may slightly affect the set. Fresh lemon juice provides essential acidity for both flavor balance and safe canning, while also helping the natural pectin activate properly. Never skip this ingredient, even if your plums seem tart enough. Pectin is optional since plums naturally contain pectin, but adding a packet ensures foolproof results, especially for beginning jam makers. Store plums at room temperature until ripe, then refrigerate for up to a week before using.
Key Techniques & Essential Method Overview
Mastering plum jam comes down to understanding four critical techniques that transform simple fruit into preserved perfection. Proper fruit preparation is your foundation – always remove pits completely and chop plums into uniform pieces for even cooking. I prefer leaving the skins on for added color, nutrition, and that lovely rustic texture, but you can peel them if you prefer silky-smooth jam. Maceration is your secret weapon for developing deep flavor; tossing cut plums with sugar and letting them sit for 15-30 minutes draws out natural juices and begins breaking down the fruit structure. Temperature control makes the difference between runny syrup and perfectly set jam – maintain a rolling boil that can’t be stirred down, typically around 220°F if you’re using a candy thermometer. The mixture should coat a spoon and form a sheet when dripped, or pass the classic plate test where a drop of jam wrinkles when pushed with your finger on a chilled plate. Proper sterilization and canning ensures your jam stays fresh for months; always use sterilized jars and process in a boiling water bath for safe long-term storage. Understanding these fundamentals means you’ll achieve consistent, professional results every single time.
Step-by-Step Plum Jam Instructions
1. Prepare your workspace by sterilizing 6-8 half-pint jars and lids in boiling water for 10 minutes. Keep them hot until ready to fill. Set up your canning pot with a rack and fill with enough water to cover jars by 2 inches.
2. Wash and prepare 3 pounds of fresh plums by removing stems, cutting in half, and removing pits. Chop into roughly ½-inch pieces, leaving skins on for beautiful color and texture. You should have about 6 cups of chopped fruit.
3. Combine prepared plums with 4 cups granulated sugar in a large, heavy-bottomed pot. Stir gently and let macerate for 20 minutes, watching as the sugar draws out the natural juices and creates a lovely syrup.
4. Add ¼ cup fresh lemon juice and bring mixture to a rolling boil over medium-high heat, stirring frequently to prevent sticking. The mixture should bubble vigorously and smell intensely fruity.
5. Continue cooking for 25-35 minutes, stirring regularly and skimming any foam that rises to the surface. The jam is ready when it reaches 220°F on a candy thermometer, or when a small amount dropped on a chilled plate wrinkles when pushed with your finger.
6. Remove from heat and immediately ladle hot jam into sterilized jars, leaving ¼-inch headspace. Wipe jar rims clean, apply lids and rings finger-tight, and process in boiling water bath for 10 minutes.
7. Cool completely on a towel-lined counter for 12-24 hours. You’ll hear the satisfying “pop” of properly sealed jars. Any jars that don’t seal should be refrigerated and used within 3 weeks.
Pro Tips & Troubleshooting Secrets
Use a mix of plum ripeness levels – about 25% slightly underripe fruit provides natural pectin for better gel formation, while fully ripe plums contribute maximum sweetness and flavor. Test for doneness using multiple methods rather than relying on just one; combine the temperature test (220°F), spoon test (jam sheets off spoon), and plate test for foolproof results. Don’t double recipes when you’re starting out, as larger batches take longer to reach proper temperature and may not set correctly. Add a pat of butter during cooking to reduce foam formation and prevent boil-overs – this old-fashioned trick saves time and frustration. If your jam is too runny after cooling, simply return it to the pot, add a packet of pectin dissolved in ¼ cup water, and reboil for 2 minutes. For overly thick jam, stir in a tablespoon of warm water until you reach desired consistency.
Creative Variations & Customizations
Transform this basic plum jam into exciting flavor combinations that reflect your personal taste and seasonal ingredients. Spiced plum jam becomes exotic with a cinnamon stick, 3 whole cloves, and a pinch of cardamom added during cooking – perfect for fall and winter spreads. Plum-ginger jam gets a zesty kick from 2 tablespoons of fresh grated ginger, creating a preserve that’s fantastic with cheese and crackers. For sugar-free versions, substitute sugar with an equal amount of sugar-free pectin designed for low-sugar recipes, though texture and shelf life will be different. Plum-lavender jam requires just 1 tablespoon of culinary lavender for an elegant, floral twist that’s beautiful for gift-giving. Scale this recipe easily – halve all ingredients for 3-4 jars, or increase proportionally for larger batches, maintaining the same cooking techniques and processing times.
Storage, Reheating & Make-Ahead Success
Properly processed plum jam keeps in a cool, dark pantry for up to 2 years, though quality is best within the first year. Once opened, refrigerate and use within 3 weeks for optimal freshness and food safety. Freezer storage works beautifully for up to 18 months – use freezer-safe containers and leave 1-inch headspace for expansion. Make-ahead preparation is simple: prep and macerate fruit the night before, then continue with cooking the next day. For gift-giving, make jam up to 6 months ahead and store in a cool, dark place. Jars that don’t seal properly should be refrigerated immediately and consumed within 3 weeks. Thaw frozen jam overnight in the refrigerator, and stir gently before serving to redistribute any separation that may have occurred.
Serving Suggestions & Perfect Pairings
Plum jam shines in countless applications beyond simple toast spreading. Classic pairings include fresh biscuits, English muffins, and crusty artisan bread, where the jam’s sweet-tart balance complements yeasty flavors perfectly. Gourmet applications feature plum jam as a glaze for roasted pork or duck, swirled into plain yogurt for an instant dessert, or layered in thumbprint cookies for elegant holiday treats. Cheese board magic happens when you pair plum jam with creamy brie, sharp cheddar, or tangy goat cheese – the fruit’s acidity cuts through rich dairy beautifully. Beverage pairings include Earl Grey tea, sparkling wine, or even craft beer with fruity notes. Complete meal ideas might feature plum jam alongside a weekend brunch spread, incorporated into vinaigrettes for summer salads, or used as a filling for homemade danish pastries.
Conclusion: Your Journey to Jam-Making Mastery
Making homemade plum jam connects you to generations of home cooks who understood that preserving summer’s abundance creates joy that lasts all year long. This recipe gives you everything needed to create professional-quality jam in your own kitchen, from selecting the perfect plums to achieving that ideal spreadable consistency. The satisfaction of hearing those jar lids pop as they seal, knowing you’ve created something both delicious and lasting, never gets old.
Ready to start your jam-making adventure? Gather your plums, clear your afternoon, and prepare to fill your kitchen with the most amazing aromas. Don’t forget to share your plum jam success stories in the comments below – I love hearing how this recipe becomes part of your family traditions! What’s your favorite way to enjoy homemade plum jam?