Prep Time: 25 minutes | Cook Time: 15 minutes | Chill Time: 4 hours | Total Time: 4 hours 40 minutes | Serves: 8-10 | Difficulty: Easy
Table of Contents
I’ll never forget the first time I watched my Aunt Mae layer her famous banana pudding in that old ceramic dish, her weathered hands moving with the confidence of someone who’d made this dessert a thousand times before. The kitchen smelled like vanilla and comfort, and as she spooned that silky custard over perfectly ripe bananas and crispy wafers, she whispered, “The secret, honey, is patience and love.” That was twenty years ago, and her homemade banana pudding recipe has become the crown jewel of every family gathering since. This isn’t just any dessert – it’s a slice of Southern heritage that transforms simple ingredients into pure magic. Whether you’re hosting Sunday dinner or need a show-stopping potluck contribution, this authentic homemade banana pudding will have everyone begging for your secret. Trust me, once you taste the difference between this from-scratch version and anything store-bought, there’s absolutely no going back.
Why You’ll Love This Homemade Banana Pudding Recipe
This easy homemade banana pudding recipe delivers everything you want in a classic Southern dessert and so much more. First, it’s incredibly approachable – despite its impressive appearance, this recipe requires no special equipment or advanced culinary skills, making it perfect for beginner cooks who want to create something truly spectacular. The homemade custard base sets this version apart from shortcuts using instant pudding mix, giving you complete control over sweetness and texture while delivering that rich, velvety consistency that makes each spoonful absolutely divine. What makes this recipe particularly family-friendly is its make-ahead nature – you can prepare it the night before parties or gatherings, and it actually improves as it sits, with the vanilla wafers softening to the perfect tender-crisp texture. The ingredient list uses pantry staples you likely already have on hand, making it budget-friendly without sacrificing any of the indulgent flavor. Finally, this banana pudding recipe is incredibly forgiving – even if your custard isn’t perfectly smooth or your layers aren’t Instagram-perfect, the end result will still taste absolutely incredible.
Essential Ingredient Insights & Smart Selection Tips
Creating exceptional homemade banana pudding starts with understanding your ingredients and making smart selections at the grocery store. The star ingredient – bananas – should be at that perfect sweet spot of ripeness: bright yellow with just a few small brown spots, firm enough to hold their shape but sweet enough to complement the custard. Avoid overripe bananas that will turn mushy and create excess moisture, or underripe ones that lack the natural sweetness this dessert depends on. For your custard base, whole milk produces the richest, creamiest texture, though you can successfully substitute with 2% milk if you prefer a lighter result. Fresh, large eggs are crucial for proper thickening – check expiration dates and choose eggs with clean, uncracked shells for food safety. Pure vanilla extract makes a noticeable difference over imitation vanilla, providing depth and complexity that artificial flavoring simply can’t match. When selecting vanilla wafers, choose boxes with the latest expiration date to ensure maximum crispness – stale cookies won’t achieve that perfect texture balance we’re after. For those with dietary restrictions, unsweetened almond milk works beautifully as a dairy substitute, and gluten-free vanilla wafers are widely available without compromising the final result.
Mastering Key Techniques & Method Overview
Success with homemade banana pudding hinges on mastering four fundamental techniques that ensure perfect results every single time. The most critical skill is creating a smooth, lump-free custard through proper tempering – this involves gradually whisking hot milk into beaten egg yolks to slowly raise their temperature without scrambling the eggs. Temperature control throughout the cooking process is absolutely essential; maintain medium-low heat and stir constantly to prevent the bottom from scorching while ensuring the custard thickens evenly to coat the back of your spoon. The second crucial technique involves strategic layering for optimal texture and flavor distribution – start with a thin foundation layer of custard to prevent the bottom wafers from becoming soggy, then alternate between pudding, banana slices, and wafers in even layers. Timing plays a vital role in the third technique: slice your bananas just before assembly to prevent browning, and consider a light brush of lemon juice if you’re concerned about discoloration during longer prep times. The final essential technique requires patience during the chilling phase – allow a minimum of four hours for proper setting, though overnight chilling produces even better results as flavors meld beautifully and textures achieve perfect harmony. Common challenges include lumpy custard (solved through constant stirring and proper heat management) and watery consistency (prevented by cooking the custard to the correct thickness before removing from heat).
Detailed Step-by-Step Cooking Instructions
Step 1: Begin by combining 3/4 cup granulated sugar, 1/3 cup all-purpose flour, and 1/4 teaspoon salt in a heavy-bottomed saucepan, whisking thoroughly until the mixture is completely smooth and lump-free.
Step 2: Gradually add 3 cups whole milk to the dry ingredients, whisking constantly to prevent lumps from forming. The mixture should be completely smooth before proceeding.
Step 3: Place the saucepan over medium heat and cook while stirring continuously with a whisk. You’ll notice the mixture gradually thickening over 8-10 minutes – it’s ready when it coats the back of a wooden spoon and bubbles gently around the edges.
Step 4: In a separate mixing bowl, lightly beat 4 large egg yolks until smooth. Here’s the critical tempering step: slowly drizzle about 1 cup of the hot milk mixture into the yolks while whisking vigorously to prevent the eggs from scrambling.
Step 5: Pour the tempered egg mixture back into the saucepan and continue cooking over medium-low heat for an additional 2-3 minutes, stirring constantly until the custard reaches a pudding-like consistency and registers 170°F on an instant-read thermometer.
Step 6: Remove from heat immediately and stir in 2 teaspoons pure vanilla extract and 2 tablespoons butter until completely incorporated. Press plastic wrap directly onto the surface to prevent a skin from forming and allow to cool for 15 minutes.
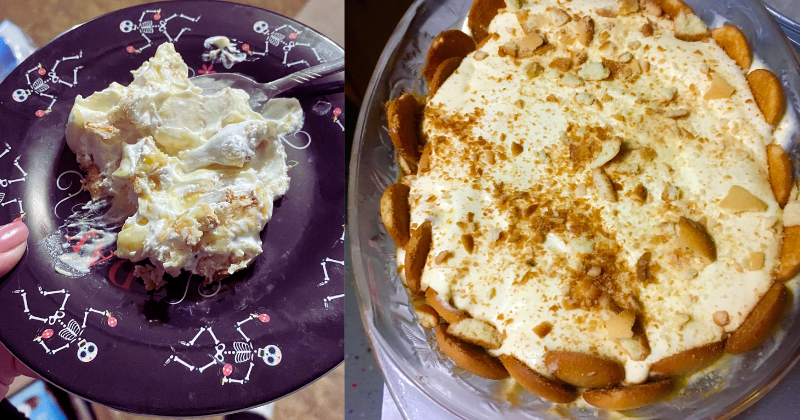
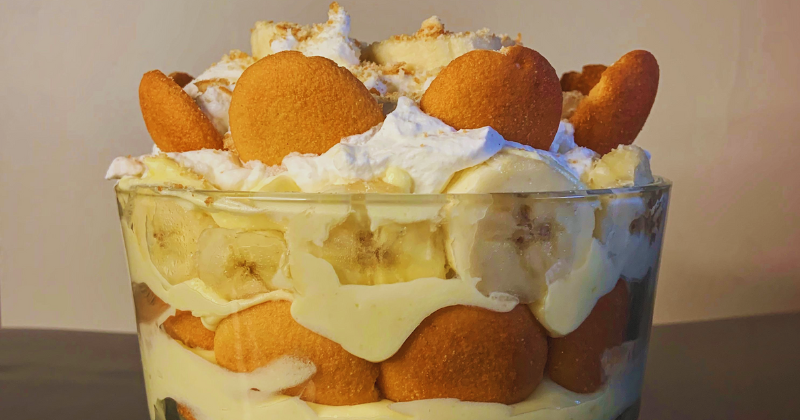
Step 7: While the custard cools, slice 4-5 perfectly ripe bananas into uniform 1/4-inch rounds. In your chosen serving dish, create beautiful layers: spread a thin layer of custard on the bottom, arrange banana slices evenly, add a single layer of vanilla wafers, then more custard. Repeat this process, ending with a smooth layer of custard on top.
Step 8: Cover tightly with plastic wrap and refrigerate for at least 4 hours or preferably overnight before serving to allow proper setting and flavor development.
Professional Pro Tips & Troubleshooting Solutions
These insider secrets from professional pastry chefs will guarantee your homemade banana pudding turns out perfectly every time. Always use a heavy-bottomed saucepan to ensure even heat distribution and prevent hot spots that can cause the custard to curdle or stick to the bottom. If your custard develops lumps despite careful attention, don’t panic – immediately strain it through a fine-mesh sieve while still warm to restore silky smoothness. The biggest mistake home cooks make is rushing the chilling process; proper texture development requires patience, so always plan ahead and resist the temptation to serve too early. For extra richness and professional-level results, fold 1 cup of freshly whipped heavy cream into the completely cooled custard before layering. Here’s an advanced technique: save your most perfect banana slices and a few whole vanilla wafers for garnishing the top layer just before serving – this creates an Instagram-worthy presentation that showcases your attention to detail. If your finished pudding seems slightly thin after chilling, don’t worry – it will continue to firm up, and the texture will be perfect once fully set.
Creative Variations & Dietary Customizations
Transform this classic recipe to accommodate different tastes and dietary needs with these delicious variations. Create a tropical paradise version by substituting coconut milk for regular milk and folding toasted coconut flakes between the layers for added texture and flavor. Chocolate enthusiasts will love mini chocolate chips sprinkled between layers or a drizzle of warm chocolate sauce over the top. For gluten-free diets, simply swap regular vanilla wafers for certified gluten-free versions – the recipe works identically with no other modifications needed. Dairy-free adaptations are easily achieved using full-fat canned coconut milk and plant-based butter alternatives. Double the recipe for large gatherings by using a 9×13-inch baking dish instead of a smaller serving bowl. For elegant individual presentations, layer the pudding in mason jars or wine glasses for portion-controlled servings that look professionally crafted.
Smart Storage, Make-Ahead & Reheating Guidelines
Proper storage techniques ensure your homemade banana pudding maintains peak quality and food safety standards. Store covered in the refrigerator for up to 4 days, though optimal banana freshness means it’s best enjoyed within 3 days of preparation. The pudding actually improves after the first day as flavors meld and vanilla wafers reach the perfect tender-crisp texture. For ultimate convenience, prepare the custard base up to 2 days in advance and store covered in the refrigerator – assemble with fresh bananas and wafers just before your event to prevent excess moisture buildup. While complete banana pudding doesn’t freeze well due to texture changes in both bananas and custard, you can freeze the custard base alone for up to 1 month. Never leave assembled pudding at room temperature for more than 2 hours to maintain food safety, and always cover tightly with plastic wrap to prevent refrigerator odor absorption.
Elegant Serving Suggestions & Perfect Pairings
Elevate your homemade banana pudding presentation with these sophisticated serving and pairing recommendations. Classic accompaniments include dollops of freshly whipped cream and a light sprinkle of crushed vanilla wafers for delightful textural contrast. For special occasions, try caramelized banana slices as garnish or a elegant drizzle of salted caramel sauce around the plate edges. This dessert pairs beautifully with robust coffee, traditional sweet tea, or ice-cold milk for family-style dinners. Wine lovers will appreciate how banana pudding complements light, sweet wines like Moscato or Riesling that enhance rather than compete with the dessert’s creamy sweetness. Create an authentic Southern feast by serving after classic comfort foods like fried chicken, barbecue, or mac and cheese. For upscale entertaining, present in clear glass serving bowls to showcase the gorgeous layers, and consider fresh mint sprigs or edible flowers for color and sophistication.
Your Journey to Banana Pudding Mastery
This homemade banana pudding recipe represents far more than just another dessert – it’s your gateway to creating cherished family memories while mastering a beloved Southern tradition. The perfect combination of silky custard, fresh bananas, and tender vanilla wafers delivers comfort in every single spoonful, while the straightforward technique ensures success for cooks at every skill level. Whether you’re continuing a treasured family tradition or starting a delicious new one, this recipe will undoubtedly earn a permanent place in your dessert repertoire.
Are you ready to create your own banana pudding legacy? Gather these simple ingredients and start layering your way to dessert perfection – your family and friends will be requesting this recipe for years to come!