Prep Time: 2 hours (including rise time) | Cook Time: 15 minutes | Total Time: 2 hours 15 minutes | Difficulty: Intermediate | Serves: 12 donuts
Table of Contents
The sweet aroma of freshly fried donuts wafting through my grandmother’s kitchen is a memory that never fails to transport me back to lazy Sunday mornings. I remember standing on a wooden stool, barely tall enough to peer over the counter, watching in wonder as she transformed simple ingredients into golden rings of pure joy. Those homemade donuts weren’t just breakfast – they were edible hugs that brought our entire family together around the kitchen table. Today, I’m sharing her time-tested recipe and the secrets I’ve learned over years of perfecting the art of donut making, so you can create these magical moments in your own home.
Why You’ll Love This Homemade Donut Recipe
There’s something truly special about making homemade donuts from scratch that goes far beyond the incredible taste. First, you have complete control over every ingredient, ensuring no artificial preservatives or mystery additives make their way into your family’s breakfast. The easy donut recipe I’m sharing uses simple pantry staples you likely already have on hand, making it incredibly accessible for home bakers of all skill levels.
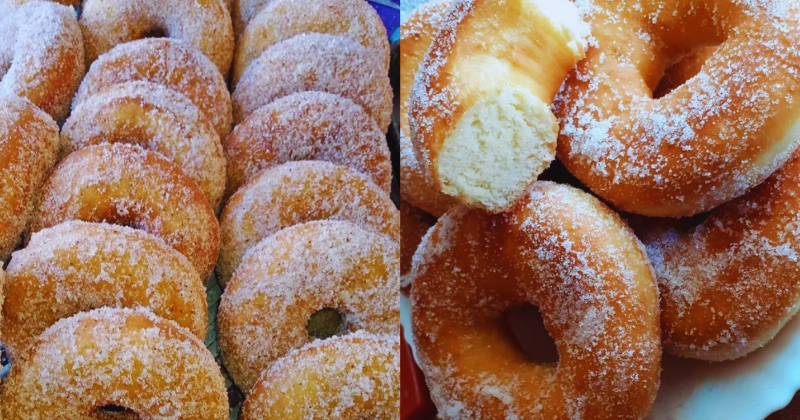
The texture you’ll achieve is absolutely divine – these donuts boast a pillowy-soft interior that’s light as air, encased in a perfectly golden, slightly crispy exterior that provides just the right amount of textural contrast. Unlike store-bought versions that often taste stale within hours, these family-friendly donuts stay fresh and delicious for days when stored properly. Perhaps most importantly, the process of making donuts together creates lasting memories, especially when little hands help with the mixing and decorating. The pride on a child’s face when they bite into a donut they helped create is absolutely priceless.
Ingredient Insights & Selection for Perfect Donuts
The foundation of exceptional homemade donuts lies in understanding your ingredients and choosing them wisely. All-purpose flour forms the structure, but the protein content matters – look for flour with 10-12% protein for the perfect balance of tenderness and structure. Fresh, active dry yeast is crucial for achieving that signature light, airy texture, so check your expiration dates and proof it in warm milk to ensure it’s alive and ready to work its magic.
Whole milk adds richness and helps create a tender crumb, though you can substitute with buttermilk for a slight tang or even plant-based milk for dietary restrictions. The eggs should be room temperature to blend smoothly with other ingredients, while butter adds flavor and keeps the donuts moist. For those with dietary needs, you can substitute the butter with coconut oil for dairy-free donuts, or use a gluten-free flour blend for celiac-friendly treats.
Quality vanilla extract makes a noticeable difference in flavor – skip the imitation and invest in pure vanilla. When selecting oil for frying, choose neutral options like canola, vegetable, or peanut oil that can withstand high temperatures without breaking down or imparting unwanted flavors.
Key Techniques & Method Overview for Donut Success
Mastering homemade donut making requires understanding several crucial techniques that separate good donuts from extraordinary ones. The first essential skill is proper dough handling – you want to knead just enough to develop the gluten structure without overworking, which would result in tough, chewy donuts. The dough should be smooth and slightly tacky but not sticky, requiring about 8-10 minutes of gentle kneading by hand or 5-6 minutes in a stand mixer.
Temperature control proves absolutely critical throughout the process. The milk for proofing yeast should feel barely warm to your wrist – too hot kills the yeast, too cold won’t activate it. During rising, the dough needs a warm, draft-free environment around 75-80°F to double properly in about an hour.
Frying technique separates amateur from professional results. Oil temperature must stay consistently between 350-375°F – use a candy thermometer for accuracy. Too cool and your donuts absorb excess oil becoming greasy; too hot and they brown before cooking through. The final crucial technique is timing – donuts should fry for exactly 1-2 minutes per side until golden brown, with careful attention to visual cues like bubbling around the edges and the beautiful golden color development.
Understanding these fundamentals ensures your donuts emerge light, fluffy, and perfectly cooked every single time, with that coveted bakery-quality texture and appearance.
Step-by-Step Instructions for Perfect Homemade Donuts
Step 1: Begin by warming 1 cup of whole milk to lukewarm temperature (around 110°F). Dissolve 1 packet (2¼ teaspoons) of active dry yeast with 1 tablespoon of sugar in the warm milk. Let this mixture sit for 5-10 minutes until it becomes frothy and bubbly – this proves your yeast is active and ready to work.
Step 2: In a large mixing bowl, cream together ¼ cup softened butter with ½ cup granulated sugar until light and fluffy. Beat in 2 large eggs one at a time, then add 1 teaspoon vanilla extract. The mixture should be smooth and well-combined.
Step 3: In a separate bowl, whisk together 3½ cups all-purpose flour, 1 teaspoon salt, and ½ teaspoon ground nutmeg. Alternately add the dry ingredients and the activated yeast mixture to the butter mixture, beginning and ending with flour. Mix until a soft dough forms that pulls away from the bowl sides.
Step 4: Turn the dough onto a lightly floured surface and knead gently for 8-10 minutes until smooth and elastic. The dough should spring back when lightly pressed. Place in a greased bowl, cover with a damp cloth, and let rise in a warm place for 1 hour until doubled in size.
Step 5: Roll the risen dough on a floured surface to ½-inch thickness. Cut with a floured donut cutter or two round cutters (3-inch and 1-inch). Place cut donuts on parchment-lined baking sheets, cover lightly, and let rise for 30 minutes until puffy.
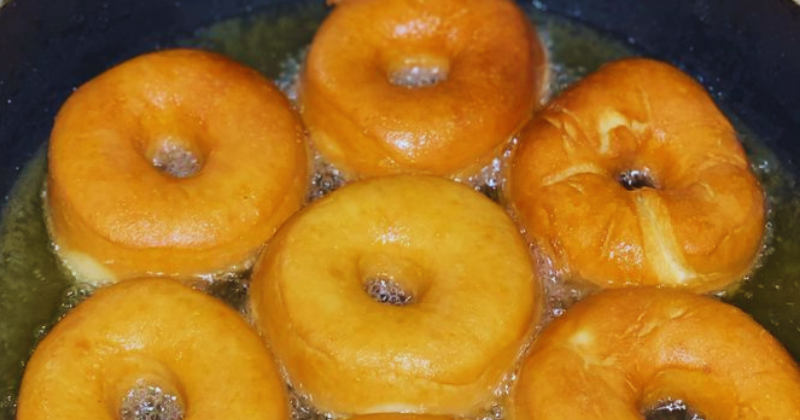
Step 6: Heat oil to 375°F in a heavy-bottomed pot. Carefully slide 2-3 donuts into the oil, frying for 1-2 minutes per side until golden brown. Use a slotted spoon to transfer to paper towel-lined plates. The donuts should sound hollow when tapped and register 190°F internally.
Pro Tips & Troubleshooting for Donut Perfection
The secret to bakery-quality homemade donuts lies in these professional techniques I’ve discovered through years of experimentation. Always fry your donut holes first – they cook faster and help you gauge if your oil temperature is perfect before committing your beautiful full-sized donuts. If your donuts are browning too quickly but seem raw inside, reduce the heat slightly and increase cooking time.
For perfectly round donuts, avoid re-rolling scraps more than once, as this develops too much gluten and creates tough donuts. Instead, gather scraps gently and use them for donut holes or a small batch of irregular-shaped treats the kids will love.
If your donuts turn out dense, check your yeast freshness and ensure your milk wasn’t too hot during proofing. Dense donuts often result from over-kneading the dough or insufficient rising time. Conversely, if they’re too fragile and fall apart, you may need slightly more flour or less liquid next time.
The most common mistake is not maintaining consistent oil temperature – invest in a good thermometer and adjust heat as needed. When donuts absorb too much oil, the temperature was too low; when they’re dark outside but raw inside, the temperature was too high.
Variations & Customizations for Every Taste
Transform this basic donut recipe into countless delicious variations to suit every preference and dietary need. For chocolate lovers, substitute ¼ cup of flour with unsweetened cocoa powder and add an extra tablespoon of sugar. Create cinnamon sugar donuts by rolling warm donuts in a mixture of ½ cup sugar and 2 teaspoons ground cinnamon.
For gluten-free donuts, replace the all-purpose flour with a quality gluten-free flour blend containing xanthan gum, though you may need to adjust liquid slightly. Dairy-free versions work beautifully with plant-based milk and coconut oil in place of butter.
Seasonal variations keep this recipe exciting year-round – add lemon zest and poppy seeds for spring, fresh blueberries for summer, pumpkin puree and warm spices for fall, or eggnog flavoring for winter holidays. You can easily double the recipe for larger gatherings or halve it for smaller families.
Storage, Reheating & Make-Ahead Tips
Fresh homemade donuts taste best within 24 hours but store beautifully when handled properly. Keep unfrosted donuts in an airtight container at room temperature for up to 3 days. For longer storage, freeze unfrosted donuts in freezer bags for up to 3 months – they thaw quickly at room temperature or can be refreshed in a 350°F oven for 2-3 minutes.
The dough can be prepared through the first rise, then refrigerated overnight. Let it come to room temperature before rolling and cutting. Cut donuts can also be frozen on baking sheets, then transferred to freezer bags – fry them directly from frozen, adding an extra minute to cooking time.
For make-ahead preparation, fry donuts completely, cool thoroughly, and freeze. Reheat frozen donuts in a 350°F oven for 5-7 minutes to restore their fresh-baked texture and warmth.
Serving Suggestions & Perfect Pairings
These golden homemade donuts shine brightest when served warm with classic accompaniments that complement their rich, yeasty flavor. Traditional glazes like simple powdered sugar and milk create an elegant finish, while chocolate ganache appeals to indulgent tastes. Fresh fruit compotes, especially strawberry or blueberry, add brightness and cut through the richness beautifully.
For beverage pairings, nothing beats fresh coffee or rich hot chocolate, though chai tea and earl grey also complement the warm spices beautifully. Create a complete brunch spread by serving alongside fresh fruit salad, crispy bacon, and scrambled eggs.
Consider setting up a donut decorating station for parties – provide various glazes, sprinkles, chopped nuts, and fresh berries so guests can customize their treats. This interactive element makes the experience memorable and ensures everyone gets exactly what they’re craving.
The joy of creating these perfect homemade donuts extends far beyond the final delicious bite – it’s about the memories made, the skills learned, and the love shared around your kitchen table, just like in my grandmother’s house all those years ago.