Prep Time: 15 minutes | Cook Time: 25 minutes | Total Time: 40 minutes | Serves: 4-6 | Difficulty: Easy
Table of Contents
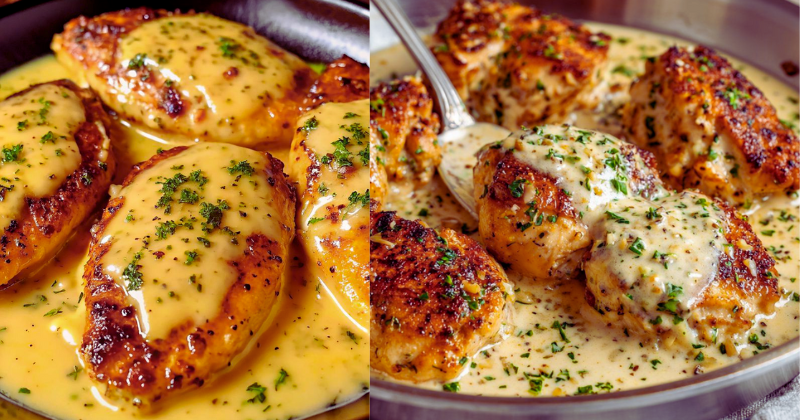
There’s something magical about the moment when garlic hits hot butter in a pan – that sizzling sound, the golden bubbles forming around each minced clove, and the incredible aroma that fills your entire kitchen. I still remember the first time my grandmother taught me to make her famous creamy garlic chicken when I was twelve years old. Standing on a wooden stool beside her ancient gas range, I watched in fascination as she transformed simple ingredients into what would become my family’s most requested dinner.
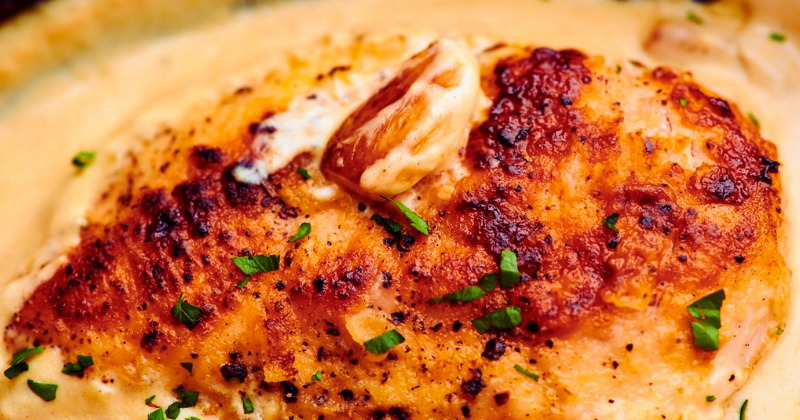
This creamy garlic chicken recipe has been the star of countless family gatherings, cozy Sunday dinners, and those weeknight moments when you need something both comforting and impressive. What started as my grandmother’s closely guarded secret has evolved into a foolproof method that delivers restaurant-quality results every single time. The tender, juicy chicken paired with that rich, garlicky cream sauce creates a harmony of flavors that never gets old.
Why You’ll Love This Creamy Garlic Chicken Recipe
This isn’t just another chicken dinner – it’s a complete comfort food experience that brings families together around the dinner table. First, it’s incredibly versatile and family-friendly, appealing to both adults and children with its mild, creamy flavor profile that’s never overwhelming. The rich sauce clings beautifully to each piece of chicken, ensuring every bite is perfectly balanced.
Second, this recipe is surprisingly easy for beginners while still offering enough technique-building opportunities for more experienced home cooks. You’ll master the art of creating a silky pan sauce, learn proper chicken searing techniques, and discover how to balance cream and acid for the perfect consistency. Third, it’s a complete one-pan meal that minimizes cleanup while maximizing flavor – everything cooks together, allowing the ingredients to meld beautifully.
Fourth, this homemade version is budget-friendly compared to restaurant alternatives, using affordable ingredients you likely already have in your pantry. Finally, it’s naturally gluten-free (with simple modifications) and can be easily adapted for various dietary preferences without sacrificing any of the comfort food appeal that makes it so special.
Ingredient Insights & Smart Selection Tips
The beauty of creamy garlic chicken lies in its simplicity – each ingredient plays a crucial role in building layers of flavor. Fresh garlic is absolutely non-negotiable here; pre-minced jarred garlic simply won’t deliver the same aromatic punch or clean flavor that makes this dish shine. Look for firm, plump cloves with tight papery skin, and don’t be afraid to use more than you think you need.
Heavy cream forms the luxurious base of our sauce, but you can substitute with half-and-half for a lighter version, though the sauce won’t be quite as rich. For those avoiding dairy, full-fat coconut cream works beautifully, adding a subtle tropical note that pairs surprisingly well with garlic. Bone-in, skin-on chicken thighs are my preference for their superior flavor and moisture retention, but boneless thighs or even chicken breasts work perfectly.
Fresh herbs make all the difference – thyme and parsley are classic choices, but rosemary or sage can add interesting variations. Store your herbs properly by trimming the stems and keeping them in water like fresh flowers. Quality chicken stock elevates the entire dish, so opt for low-sodium versions to control salt levels, or better yet, use homemade stock if you have it on hand.
Essential Techniques & Method Overview
Mastering this creamy garlic chicken requires understanding four key cooking techniques that work together seamlessly. First, proper chicken searing creates the golden-brown crust that locks in juices and provides incredible flavor depth. The secret is ensuring your chicken is completely dry before it hits the hot pan – pat each piece thoroughly with paper towels and let them sit at room temperature for 15 minutes before cooking.
Second, building the perfect pan sauce starts with deglazing those beautiful browned bits (called fond) left behind after searing the chicken. This step is crucial – those caramelized pieces contain concentrated flavor that becomes the foundation of your sauce. Use white wine, chicken stock, or even water to scrape up every bit of goodness.
Third, temperature control ensures your cream sauce stays silky smooth without breaking or curdling. Always add cream to a pan that’s off the heat or at very low temperature, whisking constantly to incorporate gradually. Fourth, the finishing techniques – adding fresh herbs at the end preserves their bright flavor and vibrant color, while a squeeze of fresh lemon juice brightens the entire dish and cuts through the richness perfectly.
Understanding these fundamentals means you’ll never have to worry about timing again. Each step builds naturally on the previous one, creating a foolproof cooking process that delivers consistent, restaurant-quality results every single time.
Step-by-Step Cooking Instructions
1. Prepare and season the chicken by patting 2 pounds of chicken thighs completely dry with paper towels. Season generously with salt and freshly ground black pepper on both sides, then let rest at room temperature for 15 minutes.
2. Heat 2 tablespoons of olive oil in a large, heavy-bottomed skillet over medium-high heat until shimmering but not smoking. Carefully place chicken skin-side down and sear for 5-6 minutes without moving – you should hear consistent sizzling. The skin should release easily when properly browned.
3. Flip the chicken and sear the other side for 4-5 minutes until golden brown. Remove chicken to a plate and tent with foil to keep warm. Don’t worry if it’s not completely cooked through – it will finish cooking in the sauce.
4. Reduce heat to medium and add 6 minced garlic cloves to the same pan with the chicken drippings. Sauté for 30-45 seconds until fragrant but not browned – burnt garlic will make the entire dish bitter.
5. Deglaze with ½ cup white wine (or chicken stock), scraping up all the browned bits with a wooden spoon. Let the liquid reduce by half, about 2-3 minutes.
6. Add 1 cup heavy cream and 1 teaspoon fresh thyme, whisking gently to combine. Return chicken to the pan, nestling pieces into the sauce. Reduce heat to low, cover partially, and simmer for 12-15 minutes until chicken reaches 165°F internal temperature.
7. Finish with 2 tablespoons fresh lemon juice and ¼ cup chopped fresh parsley. Taste and adjust seasoning with salt and pepper as needed.
Professional Tips & Troubleshooting Solutions
Use a meat thermometer to guarantee perfectly cooked chicken every time – thighs should reach 165°F, but they’re actually more forgiving than breasts and won’t dry out as easily. Don’t overcrowd the pan when searing; work in batches if necessary to maintain proper browning temperature.
If your sauce breaks or curdles, remove from heat immediately and whisk in a tablespoon of cold butter or cream to help it come back together. For extra richness, swirl in a pat of cold butter just before serving – this technique, called “mounting,” creates an incredibly silky finish.
To prevent the garlic from burning, add it after reducing the heat and keep stirring constantly. Burnt garlic is irreparable and will require starting over. Save the pan drippings – they’re liquid gold containing all the concentrated chicken flavor that makes this sauce extraordinary.
Creative Variations & Dietary Adaptations
Transform this base recipe into exciting variations by adding sun-dried tomatoes and spinach for a Mediterranean twist, or mushrooms and white wine for an elegant French-inspired version. For dairy-free preparation, substitute coconut cream and use dairy-free butter for sautéing.
Gluten-free cooks can thicken the sauce with a cornstarch slurry instead of flour if desired, though the recipe is naturally gluten-free as written. To make it lighter, use half-and-half instead of heavy cream and add extra chicken stock for volume. For spice lovers, add red pepper flakes or a dash of hot sauce to the garlic mixture.
Storage & Make-Ahead Strategies
Store leftover creamy garlic chicken in the refrigerator for up to 3 days in an airtight container. Reheat gently in a covered skillet over low heat, adding a splash of cream or stock if the sauce has thickened too much. For meal prep, prepare the chicken and sauce separately, then combine when reheating for best texture.
Freezer storage works for up to 3 months, though cream sauces may separate slightly upon thawing. Make-ahead tip: sear the chicken and prepare the sauce base earlier in the day, then finish cooking just before serving for maximum freshness and optimal texture.
Perfect Pairings & Serving Ideas
This creamy garlic chicken pairs beautifully with fluffy mashed potatoes that soak up every drop of that incredible sauce, or serve over buttered egg noodles for comfort food perfection. Roasted vegetables like asparagus, broccoli, or Brussels sprouts add color and balance to the rich sauce.
For wine pairings, choose a crisp Chardonnay or Pinot Grigio that complements the cream sauce without competing with the garlic. Fresh crusty bread is essential for sauce-sopping, and a simple green salad with lemon vinaigrette cuts through the richness perfectly. Garnish with extra fresh herbs and a lemon wedge for a restaurant-quality presentation that impresses every time.
Ready to create this comfort food masterpiece? Gather your ingredients, heat up that skillet, and prepare to fill your kitchen with the most incredible aromas. Don’t forget to share your results – I’d love to hear how this family recipe becomes part of your own cooking story!