Prep Time: 20 minutes/Cook Time: 45 minutes/Total Time: 1 hour 5 minutes/Difficulty Level: Beginner/ Serves: 8-10 people
Table of Contents
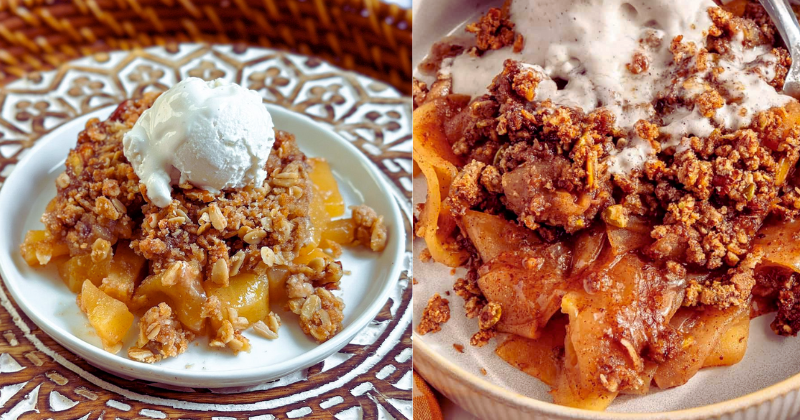
The first time I attempted to make my grandmother’s legendary apple crisp after my celiac diagnosis, I honestly thought I’d never capture that same golden, buttery crumble that had defined autumn in our household for decades. After countless kitchen experiments and a few disappointing failures, I finally cracked the code to creating a gluten-free apple crisp that’s every bit as irresistible as the original. This homemade gluten-free apple crisp delivers all the warm spices, tender apples, and that perfectly crispy topping you crave, without any of the gluten. Whether you’re managing celiac disease, gluten sensitivity, or simply choosing to eat gluten-free, this easy recipe proves that dietary restrictions don’t mean sacrificing the comfort foods that bring families together around the dinner table.
Why You’ll Love This Gluten-Free Apple Crisp Recipe
This isn’t just a gluten-free substitute – it’s a dessert that stands proudly on its own merits and will have everyone asking for seconds. The beauty of this recipe lies in how the carefully selected gluten-free flour blend creates a topping that’s actually more interesting texturally than traditional versions, with a delightful nuttiness and extra crunch that complements the soft, spiced apples beneath.
What makes this recipe truly special is its foolproof nature – even novice bakers can achieve bakery-quality results every single time. The ingredient list is surprisingly simple, using pantry staples you likely already have on hand, making it perfect for spontaneous fall baking sessions. This family-friendly dessert accommodates multiple dietary needs without compromising on flavor, and it’s naturally dairy-free when you use plant-based butter alternatives.
The make-ahead friendly nature of this recipe is another huge advantage for busy home cooks. You can assemble it hours in advance and pop it in the oven when guests arrive, filling your home with those irresistible aromas of cinnamon, nutmeg, and baked apples that instantly create a welcoming atmosphere.
Ingredient Insights & Apple Selection Guide
The foundation of exceptional gluten-free apple crisp starts with choosing the right apples, and variety truly matters here. Honeycrisp, Granny Smith, and Braeburn apples hold their shape beautifully during baking while providing the perfect balance of sweet and tart flavors. Avoid Red Delicious or Gala apples, which tend to become mushy and lose their character when baked.
For the gluten-free flour component, a high-quality all-purpose gluten-free flour blend works best – look for blends containing rice flour, potato starch, and tapioca starch for optimal texture. King Arthur and Bob’s Red Mill both produce excellent options that behave remarkably similarly to traditional wheat flour. The key is using a blend rather than single-grain flours, which can result in gritty or dense textures.
Old-fashioned rolled oats add crucial texture and heartiness to the topping, but ensure they’re certified gluten-free to avoid cross-contamination issues. The combination of brown sugar and a touch of white sugar creates complex sweetness with caramel notes, while cold butter (or vegan alternative) is essential for achieving that coveted crumbly texture. Fresh spices make a noticeable difference – if your cinnamon and nutmeg have been sitting in your spice rack for over a year, this is the perfect excuse to refresh your supply.
Essential Techniques for Perfect Gluten-Free Crisp
Mastering gluten-free apple crisp requires understanding a few key techniques that ensure success every time. The apple preparation method is crucial – slice your apples uniformly, about ¼-inch thick, to ensure even cooking. Tossing the sliced apples with a small amount of gluten-free flour helps absorb excess juices during baking, preventing a soggy bottom crust while creating a naturally thickened filling.
The topping technique separates good crisps from extraordinary ones. Cold butter must be cut into the dry ingredients using a pastry cutter or your fingertips until the mixture resembles coarse breadcrumbs with some larger, pea-sized pieces remaining. These larger butter pieces create the steam pockets that result in that coveted flaky, crispy texture. Avoid over-mixing, which can make the topping tough and dense.
Temperature control plays a vital role in achieving the perfect balance between tender apples and golden topping. Starting at a higher temperature (375°F) helps set the topping quickly, then reducing slightly allows the apples to cook through without burning the top. The visual and aromatic cues are your best guides – the topping should be deep golden brown and you should hear gentle bubbling around the edges when it’s properly done.
Resting time after baking is often overlooked but critically important. Allowing the crisp to cool for at least 15 minutes helps the filling set properly and prevents a runny mess when serving.

Step-by-Step Baking Instructions
- Prepare your workspace and oven (5 minutes): Preheat your oven to 375°F and grease a 9×13-inch baking dish with butter or cooking spray. This size accommodates the full recipe perfectly, but you can use a slightly smaller dish for a thicker crisp if preferred.
- Prepare the apple filling (10 minutes): Peel, core, and slice 8-10 medium apples into uniform ¼-inch thick pieces. In a large bowl, toss the apple slices with ½ cup granulated sugar, 2 tablespoons gluten-free flour, 1 teaspoon cinnamon, ½ teaspoon nutmeg, and a pinch of salt. The apples should be evenly coated and fragrant with spices.
- Create the crisp topping (8 minutes): In a separate bowl, combine 1 cup gluten-free flour blend, 1 cup old-fashioned gluten-free oats, ¾ cup brown sugar, ½ teaspoon cinnamon, and ½ teaspoon salt. Cut in ½ cup cold butter using a pastry cutter or your fingertips until the mixture resembles coarse crumbs with some larger pieces visible.
- Assemble the crisp (2 minutes): Spread the seasoned apples evenly in your prepared baking dish. The apples should fill the dish generously but not overflow. Sprinkle the oat topping evenly over the apples, ensuring good coverage while leaving some apple pieces visible for visual appeal.
- Bake to golden perfection (45 minutes): Place in the preheated oven and bake for 35-45 minutes, until the topping is deep golden brown and you can hear the filling bubbling gently around the edges. If the top browns too quickly, tent with foil for the remaining baking time.
- Cool and serve (15 minutes): Remove from oven and let cool for at least 15 minutes before serving. This resting period allows the filling to thicken properly and makes serving much easier.
Professional Secrets & Troubleshooting Tips
The secret to bakery-quality gluten-free apple crisp lies in these professional techniques that most home bakers overlook. First, always use a combination of apple varieties for complex flavor – try mixing tart Granny Smith with sweet Honeycrisp for the perfect balance. Adding a tablespoon of lemon juice to the apple mixture prevents browning and brightens the overall flavor profile.
For an extra-crispy topping, try this chef’s trick: add ¼ cup finely chopped nuts (pecans or walnuts work beautifully) to your oat mixture. The nuts add richness and create additional textural interest. If your topping seems to brown too quickly, create a foil tent but avoid sealing the edges completely – you want steam to escape while protecting from direct heat.
If your finished crisp seems too liquidy, don’t panic. This usually means the apples released more juice than expected. Simply return it to the oven for an additional 10-15 minutes to allow excess moisture to evaporate. Conversely, if the topping browns before the apples are tender, reduce the oven temperature to 350°F and continue baking, checking every 10 minutes.
For those dealing with altitude adjustments, reduce the sugar slightly and increase the flour by a tablespoon at elevations above 3,000 feet. The lower air pressure can cause excessive bubbling and overflow otherwise.
Creative Variations & Dietary Adaptations
Transform this basic recipe into exciting flavor combinations that keep your dessert repertoire fresh and interesting. For a autumn spice blend, add ¼ teaspoon ground ginger and a pinch of cardamom to both the apple mixture and the topping. Create a caramel apple version by drizzling 2 tablespoons of caramel sauce over the apples before adding the topping.
Berry lovers can substitute 2 cups of the apples with fresh or frozen cranberries for a tart twist that’s perfect for holiday gatherings. For dairy-free needs, simply substitute the butter with an equal amount of solid coconut oil or your favorite plant-based butter alternative – the texture remains remarkably similar.
Nut-free households can safely omit any nuts from variations while still achieving excellent results. For lower sugar options, reduce the granulated sugar by half and add a teaspoon of vanilla extract to enhance sweetness perception without additional calories.
To scale this recipe for different crowd sizes, simply halve all ingredients for a smaller 8×8-inch pan, or increase by 50% for a large roasting pan to feed a crowd.
Storage & Make-Ahead Strategies
Proper storage extends the life of your gluten-free apple crisp while maintaining optimal texture and flavor. Store covered at room temperature for up to 2 days, or refrigerate for up to 5 days. The crisp topping will soften slightly during storage, but a quick stint under the broiler for 2-3 minutes will restore much of the original crispness.
For make-ahead convenience, assemble the entire crisp up to 24 hours in advance and refrigerate covered until ready to bake. Add an extra 5-10 minutes to the baking time if baking directly from the refrigerator. This technique is perfect for holiday meal preparation when oven space is at a premium.
Freezer storage works beautifully for both baked and unbaked crisps. Wrap tightly in plastic wrap and aluminum foil, and freeze for up to 3 months. Thaw overnight in the refrigerator before reheating. Baked crisps reheat best in a 350°F oven for 15-20 minutes, while unbaked frozen crisps can go directly from freezer to oven with an additional 15-20 minutes of baking time.
Perfect Pairings & Serving Ideas
The versatility of gluten-free apple crisp makes it suitable for various occasions and pairing opportunities. Classic vanilla ice cream remains the gold standard accompaniment, but consider branching out with cinnamon ice cream, salted caramel gelato, or even a dollop of fresh whipped cream infused with maple syrup.
For beverage pairings, hot beverages complement the warm spices beautifully – try serving with freshly brewed coffee, spiced chai tea, or hot apple cider. Wine enthusiasts will appreciate how this dessert pairs with dessert wines like Moscato or late-harvest Riesling.
Transform leftovers into special breakfast treats by serving warmed crisp over Greek yogurt with a drizzle of honey, or create an indulgent breakfast parfait by layering crisp with yogurt and fresh berries in mason jars for an Instagram-worthy morning meal.
Ready to fill your kitchen with the irresistible aromas of fall baking? This gluten-free apple crisp recipe proves that dietary restrictions never have to mean sacrificing the comfort foods that create lasting memories. Whether you’re serving family dinner or hosting friends, this foolproof dessert delivers the perfect ending to any meal while accommodating gluten-free needs beautifully.