Prep Time: 20 minutes | Chill Time: 4+ hours | Churn Time: 20-25 minutes | Total Time: 5+ hours | Serves: 6-8 | Difficulty: Intermediate
Table of Contents
The summer I turned twelve, my grandmother taught me the sacred art of making homemade vanilla ice cream on her old wooden front porch. I can still hear the rhythmic churning of that ancient hand-crank freezer and smell the intoxicating aroma of real vanilla beans steeping in warm cream. What started as a way to beat the sweltering Georgia heat became a cherished family tradition that I’ve carried into my own kitchen decades later. There’s something truly magical about creating homemade vanilla ice cream from scratch – the silky custard base, the anticipation during churning, and that first spoonful of creamy perfection that no store-bought version can ever replicate. This recipe captures all those nostalgic flavors while using modern techniques that guarantee success every single time.
Why You’ll Love This Homemade Vanilla Ice Cream
This isn’t just another vanilla ice cream recipe – it’s your gateway to creating restaurant-quality frozen dessert that will have your family begging for more. First and foremost, making homemade vanilla ice cream gives you complete control over ingredients, meaning no artificial flavors, stabilizers, or preservatives that you can’t pronounce. The rich, custard-based recipe creates an incredibly smooth and creamy texture that’s far superior to most commercial varieties, with a deep vanilla flavor that comes from real vanilla beans and pure extract.
Beyond the superior taste, this recipe is surprisingly family-friendly and manageable, requiring just basic kitchen equipment and ingredients you likely already have on hand. The process itself becomes a delightful activity that brings people together – there’s something magical about watching cream transform into frozen gold right before your eyes. Additionally, once you master this base recipe, you’ll unlock endless possibilities for customization, from seasonal fruit swirls to decadent mix-ins. The cost savings are substantial too; you can create premium-quality ice cream for a fraction of what you’d pay for artisanal brands, making it perfect for entertaining or treating your family to something special.
Essential Ingredient Insights & Selection Tips
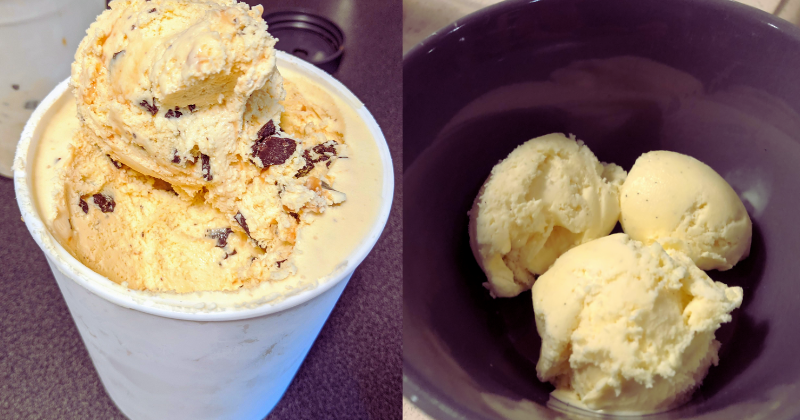
The foundation of exceptional homemade vanilla ice cream lies in selecting premium ingredients, and each component plays a crucial role in the final product. Heavy cream with at least 35% fat content is non-negotiable – this high fat content creates the luxurious mouthfeel and prevents icy crystals from forming. Look for cream that’s as fresh as possible, ideally with at least a week before the expiration date for optimal flavor and performance.
For the vanilla component, invest in real vanilla extract and, if possible, a whole vanilla bean for the ultimate flavor experience. Pure vanilla extract should list vanilla beans and alcohol as the only ingredients – avoid imitation vanilla at all costs. If using vanilla beans, Madagascar beans offer sweet, creamy notes while Tahitian beans provide floral complexity. Fresh, high-quality eggs are essential for the custard base; farm-fresh eggs with bright orange yolks will give your ice cream a beautiful color and rich flavor.
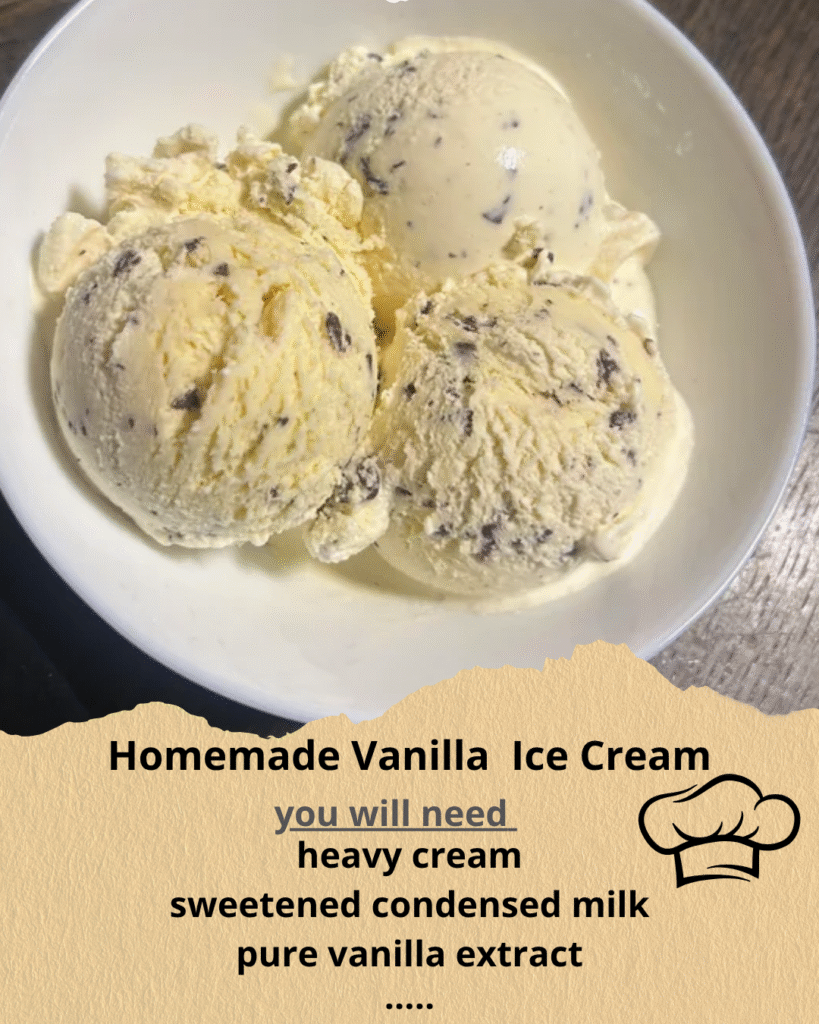
Whole milk balances the heavy cream’s richness while maintaining creaminess, and granulated sugar dissolves most easily during the heating process. A pinch of fine sea salt enhances all the flavors without making the ice cream taste salty. Store dairy products properly refrigerated, use eggs within a week of purchase, and vanilla extract keeps indefinitely when stored in a cool, dark place. For those with dietary restrictions, you can substitute coconut cream for heavy cream and use egg substitutes, though the texture will differ slightly.
Key Techniques & Method Mastery
Creating perfect homemade vanilla ice cream requires mastering four essential techniques that separate amateur attempts from professional results. The first critical skill is tempering eggs properly to create a smooth custard base without scrambling. This involves slowly adding hot cream to beaten egg yolks while whisking constantly, raising the egg temperature gradually to prevent curdling. The key is patience – add the hot cream in a thin, steady stream while whisking vigorously.
The second crucial technique is achieving the perfect custard consistency, which should coat the back of a spoon and register 170-175°F on an instant-read thermometer. This temperature ensures the eggs are properly cooked while maintaining a smooth, silky texture. Visual cues include the mixture thickening noticeably and leaving a clear line when you draw your finger across the spoon-coated back.
Third, proper cooling and chilling technique dramatically impacts the final texture. The custard must be cooled quickly using an ice bath, then chilled thoroughly for at least 4 hours or overnight. This aging process allows flavors to meld and ensures optimal churning results. Finally, churning technique varies by machine type, but the goal is incorporating air while freezing simultaneously. Most machines require 20-25 minutes of churning, and you’ll know it’s ready when the mixture holds soft peaks and has increased in volume significantly.
Step-by-Step Vanilla Ice Cream Instructions
Step 1: In a heavy-bottomed saucepan, combine 2 cups heavy cream, 1 cup whole milk, and 1/2 vanilla bean (split and scraped) or 2 teaspoons vanilla extract. Heat over medium heat until small bubbles form around the edges and the mixture steams – don’t let it boil.
Step 2: While the cream heats, whisk 6 large egg yolks with 3/4 cup granulated sugar and 1/4 teaspoon salt in a large bowl until the mixture is pale yellow and slightly thickened, about 2-3 minutes of vigorous whisking.
Step 3: Remove the cream mixture from heat. Slowly drizzle about 1/2 cup of the hot cream into the egg mixture while whisking constantly to temper the eggs. Continue adding the remaining cream in a steady stream, whisking continuously to prevent the eggs from cooking.
Step 4: Return the entire mixture to the saucepan and cook over medium-low heat, stirring constantly with a wooden spoon or heat-proof spatula. The custard is ready when it coats the spoon and reaches 170-175°F, approximately 5-8 minutes. You should hear gentle bubbling but see no vigorous boiling.
Step 5: Immediately strain the custard through a fine-mesh sieve into a clean bowl to remove any lumps or vanilla bean pieces. Press plastic wrap directly onto the surface to prevent a skin from forming, then refrigerate for at least 4 hours or overnight.
Step 6: Churn the chilled custard in your ice cream maker according to manufacturer’s instructions, typically 20-25 minutes until it resembles soft-serve consistency. Transfer to an airtight container and freeze for at least 2 hours before serving for firm scooping consistency.
Professional Tips & Troubleshooting Secrets
The difference between good and extraordinary homemade vanilla ice cream often comes down to these insider techniques that professional ice cream makers swear by. First, always strain your custard base, even if it looks perfectly smooth – this removes any potential lumps and ensures silky texture. If your custard accidentally curdles, don’t panic; immediately strain it through a fine-mesh sieve and blend with an immersion blender until smooth.
Temperature control is absolutely critical throughout the process. Use an instant-read thermometer rather than guessing, and remember that custard will continue cooking from residual heat even after removing from the stove. If your ice cream turns out icy, the culprit is usually insufficient fat content or over-churning – stick to the recipe ratios and timing guidelines.
For the smoothest possible texture, some professional ice cream makers add a tablespoon of vodka or corn syrup to the base before churning, as alcohol and corn syrup lower the freezing point and prevent crystallization. Never skip the aging process in the refrigerator; this 4+ hour chill time allows the base to hydrate fully and churn more efficiently. Finally, if your ice cream maker bowl isn’t cold enough, your ice cream won’t set properly – ensure it’s been frozen for at least 24 hours before use.
Creative Variations & Flavor Customizations
This versatile homemade vanilla ice cream base adapts beautifully to countless flavor variations and dietary modifications. Transform it into French vanilla by using only egg yolks and adding an extra vanilla bean, or create a lighter version by substituting half-and-half for some of the heavy cream. For chocolate lovers, whisk in 3 tablespoons of cocoa powder with the sugar, or fold in chocolate chips during the last few minutes of churning.
Seasonal variations keep things exciting year-round: add fresh strawberry puree in summer, pumpkin puree and spices in fall, or peppermint extract during the holidays. For those following dairy-free diets, substitute coconut cream and coconut milk in equal proportions, though the flavor will be noticeably different. Sugar alternatives like erythritol or stevia can replace granulated sugar, but adjust quantities according to package directions as sweetness levels vary significantly.
The recipe scales perfectly – double it for parties or halve it for smaller households. Add mix-ins like cookies, candy, or nuts during the final few minutes of churning to avoid breaking the ice cream maker’s paddle.
Storage & Make-Ahead Strategies
Proper storage technique ensures your homemade vanilla ice cream maintains its creamy texture and fresh flavor for weeks. Transfer freshly churned ice cream to an airtight, freezer-safe container, pressing parchment paper directly onto the surface before sealing to prevent ice crystals from forming. Store in the coldest part of your freezer, typically the back, where temperature fluctuations are minimal.
Homemade ice cream stays at peak quality for up to one month when stored properly, though it’s best consumed within two weeks for optimal texture and flavor. Unlike commercial ice cream, homemade versions freeze harder due to the absence of stabilizers, so remove from the freezer 5-10 minutes before serving to allow for easier scooping.
The custard base can be made up to three days in advance and stored in the refrigerator before churning, making this perfect for entertaining. For longer storage, the custard base freezes well for up to three months – thaw overnight in the refrigerator before churning. Never refreeze melted ice cream, as the texture will become grainy and unpalatable.
Serving Ideas & Perfect Pairings
Homemade vanilla ice cream is delicious on its own, but strategic pairings elevate it to restaurant-dessert status. Serve alongside warm desserts like apple pie, chocolate brownies, or fruit cobblers for the classic hot-and-cold contrast that never fails to impress. Fresh berries, sliced peaches, or a drizzle of homemade caramel sauce add color and complementary flavors without overwhelming the vanilla.
For elegant presentations, serve in chilled bowls with a sprinkle of toasted nuts, a few fresh mint leaves, or a delicate wafer cookie. Wine pairings work beautifully too – try late-harvest Riesling, port, or champagne for sophisticated dinner parties. Create ice cream sandwiches with homemade cookies, or use as the base for elaborate sundaes with multiple toppings and sauces.
Consider seasonal garnishes: candied citrus peels in winter, edible flowers in spring, or cinnamon and nutmeg in fall to create memorable presentations that celebrate the time of year.
Ready to create your own frozen masterpiece? This homemade vanilla ice cream recipe delivers creamy, rich results that will transport you back to childhood summers while impressing guests with its sophisticated flavor. Don’t let another summer pass without experiencing the pure joy of homemade ice cream – your taste buds deserve this sweet indulgence!