Table of Contents
Last Sunday morning, I was making my grandmother’s famous pancakes for the family when disaster struck. The bacon grease splattered everywhere, and before I knew it, my beautiful glass-top stove looked like a crime scene. The burnt-on grease seemed impossible to remove, turning what should have been a delightful breakfast into a cleaning nightmare. If you’ve ever found yourself staring at a grease-covered stove top wondering how to remove burnt on grease from stove top surfaces, you’re not alone. Whether it’s from splattering oil, boiled-over sauces, or that one time you forgot about the skillet, stubborn grease buildup is every home cook’s nemesis. But here’s the good news: with the right techniques and a little patience, you can restore your stove top to its former glory without harsh chemicals or expensive cleaning products.
Why You’ll Love This Cleaning Method
This comprehensive approach to removing burnt-on grease offers several compelling advantages that make it a game-changer for your kitchen maintenance routine. First, it’s incredibly budget-friendly – using common household items you likely already have in your pantry, eliminating the need for expensive commercial cleaners. The methods are completely safe for your family, avoiding harsh chemicals that can leave toxic residues on cooking surfaces where you prepare food daily.
You’ll also appreciate how versatile these techniques are, working effectively on glass-top, coil, and gas stove tops with minor adjustments. The step-by-step process is designed to be foolproof, ensuring even novice cleaners can achieve professional results. Most importantly, these methods are gentle yet powerful, removing even the most stubborn burnt-on grease without damaging your stove’s surface or finish, preserving your appliance’s longevity and appearance.
Essential Ingredients & Cleaning Supplies
The beauty of this cleaning method lies in its simplicity – you’ll need just a few basic household items to tackle even the most stubborn grease buildup. Baking soda serves as your primary abrasive agent, gentle enough not to scratch surfaces yet effective at breaking down greasy residues. White vinegar acts as the acidic component that cuts through grease and neutralizes odors naturally.
Dawn dish soap (or any grease-cutting dish detergent) provides the surfactant power needed to lift and emulsify stubborn grease particles. For equipment, gather microfiber cloths for streak-free cleaning, a plastic scraper or old credit card for gentle scraping, and a spray bottle for even application. Paper towels work well for initial grease removal, while a soft-bristled toothbrush helps tackle crevices around burners.
If you don’t have baking soda, cream of tartar mixed with lemon juice creates a similar paste. For vinegar substitutes, lemon juice provides comparable acidity. Always choose microfiber over regular cloths – they’re more effective at trapping grease particles and won’t leave lint behind. Store these supplies together in a caddy under your kitchen sink for quick access whenever spills occur.
Key Techniques & Method Overview
Successfully removing burnt-on grease requires understanding four essential techniques that work together to break down, lift, and eliminate stubborn residues. The first technique is the “soak and soften” method, where you apply a baking soda paste and allow it to sit for 15-20 minutes. This gives the alkaline baking soda time to break down acidic grease compounds and soften hardened buildup.
The second crucial technique is the “acid-base reaction” approach, where you spray vinegar over the baking soda paste. This creates a gentle fizzing action that helps lift grease from the surface without aggressive scrubbing. The bubbling reaction mechanically loosens particles while the chemical interaction neutralizes both acidic and basic components of grease.
Your third essential technique involves proper scraping methodology – always use plastic tools and work at a 45-degree angle to avoid scratching. Start from the outside edges of grease spots and work inward, preventing the spread of debris. Finally, master the “systematic cleaning pattern” by working in small sections, completing each area fully before moving to the next. This prevents cross-contamination and ensures consistent results across your entire stove top surface.
Step-by-Step Cleaning Instructions
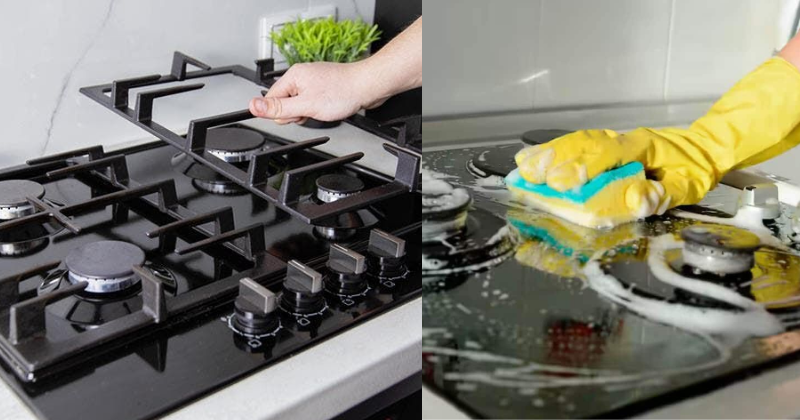
Step 1: Ensure your stove top is completely cool to the touch – this is crucial for both safety and cleaning effectiveness. Remove all removable parts including drip pans, coil burners, or grates, and set them aside for separate cleaning.
Step 2: Create your cleaning paste by mixing three parts baking soda with one part water until you achieve a thick, spreadable consistency. The mixture should hold its shape but remain pliable enough to spread evenly.
Step 3: Apply the baking soda paste generously over all burnt-on grease areas, ensuring complete coverage. Use your fingers or a soft cloth to spread it evenly, creating a layer about 1/8-inch thick. Pay special attention to heavily soiled areas around burners.
Step 4: Allow the paste to sit undisturbed for 15-20 minutes. During this time, the baking soda will soften and begin breaking down the grease. You’ll notice the paste may darken slightly as it absorbs oils and grime.
Step 5: Fill your spray bottle with white vinegar and mist the entire baking soda-covered surface. The mixture will begin fizzing immediately – this bubbling action helps lift stubborn grease particles mechanically.
Step 6: Using your plastic scraper, gently work over the surface using smooth, consistent strokes. The softened grease should lift away easily. For particularly stubborn spots, apply additional paste and let it sit for another 10 minutes.
Step 7: Wipe away all residue with damp microfiber cloths, rinsing frequently in clean water. Follow up with a final wipe using a cloth dampened with vinegar solution for streak-free results and optimal shine.
Pro Tips & Troubleshooting Secrets
Professional cleaners swear by these insider techniques that guarantee superior results every time. First, always clean spills immediately while they’re still warm – grease becomes exponentially harder to remove once it cools and hardens. For extra-stubborn spots, place a warm, damp cloth over the baking soda paste to create a steam effect that penetrates deeper into the grease.
If you encounter grease that won’t budge, try the “heat method” – turn your oven light on and place a bowl of hot water nearby to create gentle warmth that softens stubborn residues. Never use abrasive scrubbers or steel wool on glass surfaces, as they’ll create permanent scratches that are impossible to repair.
For recurring grease problems, apply a thin layer of car wax to clean surfaces monthly – this creates a protective barrier that makes future cleanup exponentially easier. When dealing with burnt-on food particles mixed with grease, soak the area with warm soapy water for 10 minutes before applying the baking soda treatment.
Variations & Customizations for Different Stove Types
Glass-top stoves require the gentlest approach – use only plastic scrapers and avoid circular scrubbing motions that can create swirl marks. For these surfaces, add a drop of dish soap to your baking soda paste for enhanced grease-cutting power without additional abrasiveness.
Coil electric stoves benefit from removing the coils entirely and soaking drip pans in hot, soapy water while you clean the main surface. Gas stove owners should remove grates and burner caps, cleaning them separately with the same baking soda paste method.
For commercial-grade or restaurant-style stoves, increase the baking soda concentration slightly and allow longer soaking times. Stainless steel surfaces can handle slightly more aggressive scrubbing, but always work with the grain pattern to avoid visible scratches.
Storage, Maintenance & Prevention Tips
Store your homemade cleaning paste in an airtight container for up to one month – just add a small amount of water if it dries out. Keep pre-mixed vinegar solution in a labeled spray bottle under your sink for quick touch-ups after cooking.
Establish a weekly maintenance routine by wiping down your stove top with a damp microfiber cloth after each use. This prevents grease accumulation and makes deep cleaning sessions much less frequent and intensive.
For optimal prevention, use splatter screens when frying, keep exhaust fans running during cooking, and immediately wipe up any spills while they’re still liquid. Consider applying a commercial stove top protector or using removable burner covers during heavy cooking sessions.
When to Deep Clean & Professional Maintenance
Plan for thorough deep cleaning monthly or after any major cooking events like holiday meal preparation. If you notice grease buildup becoming increasingly difficult to remove with regular cleaning, it’s time for the intensive baking soda treatment.
Consider professional appliance cleaning annually, especially for high-end or built-in stove tops where proper maintenance affects both performance and warranty coverage. Some manufacturers recommend specific cleaning products, so check your manual before trying new methods.
Replace cleaning cloths regularly – old, saturated microfiber loses its effectiveness and can actually redistribute grease rather than removing it. Fresh cleaning tools ensure optimal results and prevent cross-contamination between cleaning sessions.
Don’t let burnt-on grease turn your beloved stove top into a source of frustration. With these proven techniques, you can restore any stove surface to sparkling cleanliness using simple, safe ingredients you already have at home. The combination of patience, proper technique, and regular maintenance will keep your kitchen’s heart looking beautiful and functioning perfectly for years to come. Try this method next time grease threatens to take over your stove – your future self will thank you for maintaining such an essential part of your culinary space.