
Prep Time: 30 minutes (active) | Rise Time: 18-24 hours | Bake Time: 45 minutes | Total Time: 2 days | Difficulty: Intermediate | Serves: 8-10 slices
Table of Contents
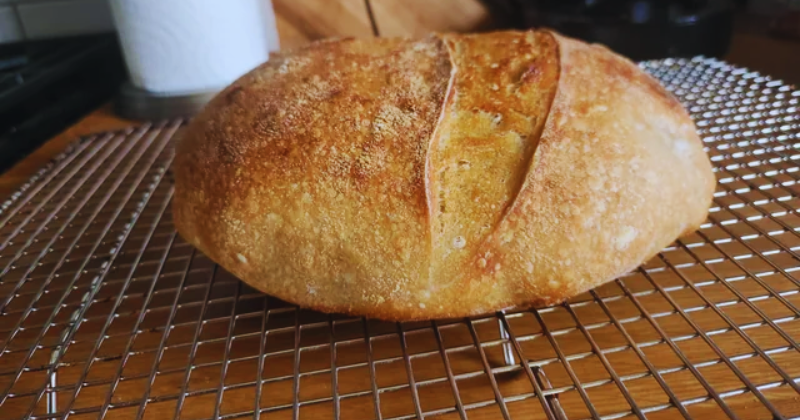
The first time I pulled a golden, crackling loaf of homemade artisan sourdough bread from my oven, the kitchen filled with that unmistakable aroma that instantly transported me to my grandmother’s farmhouse kitchen. She would spend entire weekends nurturing her sourdough starter like a beloved pet, feeding it religiously and whispering sweet encouragements as if it could hear her love. That moment when I finally mastered this ancient art felt like reconnecting with generations of bakers who understood that true bread-making is equal parts science, patience, and pure magic. Creating your own artisan sourdough bread isn’t just about baking—it’s about embracing a slower, more intentional way of living that our fast-paced world desperately needs.
Why You’ll Love This Homemade Artisan Sourdough Recipe
This homemade sourdough bread recipe will transform your kitchen into an artisan bakery and your home into a haven of incredible aromas. The naturally fermented dough creates complex, tangy flavors that simply cannot be replicated with commercial yeast, while the long fermentation process breaks down gluten proteins, making it easier to digest than conventional bread. You’ll save money compared to expensive bakery loaves while controlling every single ingredient that goes into your family’s daily bread. The therapeutic rhythm of mixing, folding, and waiting provides a meditative break from our digital world, teaching patience and mindfulness through the ancient art of bread-making. Your homemade loaves will have that coveted artisan appearance with a beautifully blistered crust, open crumb structure, and complex flavor profile that will impress family and friends. Most importantly, this recipe is surprisingly forgiving for beginners while offering endless opportunities for experimentation as your skills develop.
Ingredient Insights & Selection for Perfect Sourdough
The beauty of authentic sourdough lies in its simplicity—just flour, water, salt, and your active sourdough starter create magic together. Choose high-quality bread flour with 12-14% protein content for the best gluten development and structure; King Arthur or Bob’s Red Mill are excellent choices. Your sourdough starter should be bubbly, doubled in size, and pass the float test (a spoonful floats in water) when ready to use. Sea salt or kosher salt provides mineral complexity that enhances flavor development, while filtered water prevents chlorine from inhibiting fermentation. For whole grain variations, substitute up to 30% of the bread flour with whole wheat, spelt, or rye flour for added nutrition and rustic flavor. Store your flour in airtight containers to maintain freshness, and always use room temperature ingredients unless specified otherwise. If your starter isn’t quite ready, feed it 4-6 hours before baking and wait for peak activity—patience here determines your bread’s rise and flavor development.
Key Techniques & Method Overview
Mastering sourdough requires understanding four essential techniques that separate amateur from artisan results. Autolyse involves mixing flour and water first, allowing them to hydrate for 30-60 minutes before adding starter and salt—this develops gluten naturally and improves texture. Bulk fermentation with strategic folds replaces traditional kneading; perform 4-6 sets of folds every 30 minutes during the first few hours to build strength without overworking the dough. Proper shaping techniques create surface tension that helps your loaf maintain structure during the final rise—practice the letter fold and final boule shaping until it becomes second nature. Managing fermentation timing is crucial; the dough should increase by 50-70% during bulk fermentation, which typically takes 4-6 hours at room temperature but varies with starter strength and ambient temperature. Watch for visual cues like a slightly jiggly, aerated dough with visible bubbles on the surface. The overnight final proof in the refrigerator develops flavor while making the dough easier to score and handle. Temperature control is your secret weapon—warmer environments speed fermentation while cooler temperatures slow it down, giving you flexibility in timing.
Step-by-Step Instructions for Artisan Sourdough Success
1. Create the autolyse (Day 1, morning): Combine 375g bread flour with 275g room temperature filtered water in a large mixing bowl. Mix until no dry flour remains, creating a shaggy, rough dough. Cover and let rest for 45 minutes while the flour fully hydrates.
2. Add starter and salt: Incorporate 75g active sourdough starter and 8g sea salt into the autolyse mixture. Squeeze and fold the dough with wet hands until the starter and salt are fully integrated—the dough will feel sticky and alive.
3. Begin bulk fermentation: Transfer to a lightly oiled bowl. Over the next 3-4 hours, perform 6 sets of folds every 30 minutes: wet your hands, grab one side of the dough, stretch up, and fold over to the opposite side. Rotate the bowl and repeat 3 more times.
4. Complete bulk fermentation: After the final fold, let the dough rest undisturbed for 2-3 hours until it increases by 60% and feels jiggly with visible surface bubbles. The dough should hold its shape but still feel soft and alive.
5. Pre-shape and bench rest: Turn the dough onto a lightly floured surface. Shape into a loose round using a bench scraper, creating surface tension. Cover with a damp towel and rest for 30 minutes.
6. Final shaping: Shape into a tight boule or batard, creating good surface tension. Place seam-side up in a banneton or bowl lined with a floured cloth. Cover and refrigerate for 12-24 hours.
7. Bake to perfection: Preheat a Dutch oven to 475°F for 45 minutes. Score the dough with a sharp blade, transfer to the hot pot, and bake covered for 30 minutes, then uncovered for 15-20 minutes until deep golden brown. The internal temperature should reach 205-210°F.
Pro Tips & Troubleshooting for Guaranteed Success
Temperature is everything—invest in a kitchen thermometer and maintain your dough between 75-78°F for optimal fermentation timing. The poke test reveals readiness: gently poke the shaped dough; it should spring back slowly, leaving a slight indentation. Steam creates that coveted crust—place ice cubes in a metal pan on the oven bottom, or use a Dutch oven for professional-level steam circulation. Scoring technique matters: use a sharp lame or razor blade held at a 30-degree angle, making one confident slash about ½ inch deep. If your dough spreads too much, it’s likely over-proofed; reduce fermentation time next batch. Dense bread usually indicates under-active starter—ensure it doubles within 4-6 hours of feeding before using. For a more open crumb, increase hydration by 10-15g water and handle the dough more gently during shaping.
Variations & Customizations
Transform your basic sourdough into exciting variations by incorporating 50g each of toasted walnuts and dried cranberries during the final fold for a festive holiday loaf. Replace 75g bread flour with whole wheat flour for added nutrition and nutty flavor complexity. Create an everything bagel version by rolling the shaped dough in a mixture of sesame seeds, poppy seeds, dried garlic, and onion flakes before the final proof. For chocolate lovers, fold in 100g dark chocolate chips and a tablespoon of cocoa powder. Scale the recipe up or down by maintaining the same ratios: 75% flour to water, 20% starter, and 2% salt by weight. Gluten-free adaptations require specialized flour blends and increased hydration—expect denser results but still delicious flavor.
Storage, Reheating & Make-Ahead Tips
Fresh sourdough stays optimal for 3-4 days wrapped in a clean kitchen towel, then stored cut-side down on a cutting board—avoid plastic bags that soften the crust. Reheat slices in a toaster or refresh the whole loaf by misting with water and warming in a 350°F oven for 5-7 minutes. Freeze whole loaves for up to 3 months wrapped tightly in plastic, then foil; thaw overnight at room temperature before refreshing in the oven. Make-ahead flexibility comes from the cold fermentation—shaped loaves can refrigerate for up to 48 hours before baking. Slice and freeze individual portions for quick breakfast toast throughout the week. Day-old bread makes incredible French toast or breadcrumbs for other recipes.
Serving Suggestions & Pairings
Classic pairings include creamy European butter, local honey, or artisanal jams that complement the bread’s tangy complexity. Create an impressive cheese board featuring aged cheddar, brie, and goat cheese alongside your fresh sourdough slices. Wine enthusiasts will appreciate how sourdough’s acidity pairs beautifully with both crisp white wines and medium-bodied reds. Build memorable sandwiches with layers of prosciutto, fresh mozzarella, and basil, or create the ultimate grilled cheese using aged gruyere. Breakfast possibilities include avocado toast with everything bagel seasoning, or French toast that showcases the bread’s complex flavor. Transform day-old bread into rustic bread salad with ripe tomatoes, fresh herbs, and good olive oil.
Final Thoughts: Your Sourdough Journey Begins
Creating homemade artisan sourdough bread connects you to thousands of years of baking tradition while filling your home with incomparable aromas and flavors. Each loaf teaches patience, builds confidence, and rewards you with something truly special that no store can replicate. Start your sourdough journey today—your family, your kitchen, and your soul will thank you for embracing this beautiful, ancient art that turns simple ingredients into pure magic.
Have you tried making sourdough bread at home? Share your experiences and favorite variations in the comments below—I’d love to hear about your baking adventures and help troubleshoot any challenges you’ve encountered!