Prep Time: 15 minutes | Rise Time: 12-24 hours | Bake Time: 18-22 minutes | Total Time: 12+ hours | Serves: 12 rolls | Difficulty: Beginner.
Table of Contents
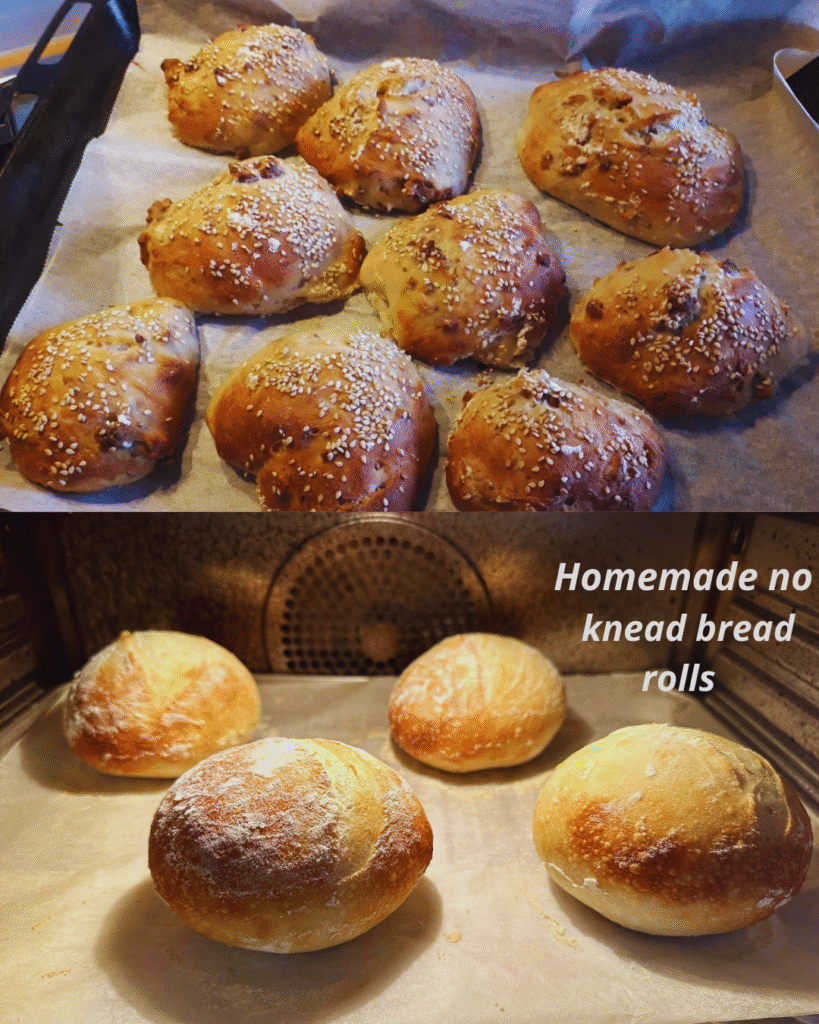
I’ll never forget the Sunday morning when my grandmother’s arthritis prevented her from kneading her famous dinner rolls. As she sat at her kitchen table, frustrated tears welling up, I desperately searched online for a solution. That’s when I discovered the magic of homemade no knead bread rolls – a technique so simple yet transformative that it literally saved our family bread tradition. These incredibly soft, pillowy rolls require absolutely no kneading, just time and patience, making them perfect for bakers of all skill levels.
What started as a necessity became my go-to recipe for effortless homemade bread. These no knead bread rolls deliver bakery-quality results with minimal hands-on effort, proving that sometimes the best solutions are also the simplest ones. Whether you’re a beginner baker or someone dealing with physical limitations, this recipe will revolutionize your approach to homemade bread.
Why You’ll Love This No Knead Bread Roll Recipe
Incredibly Easy Process: Unlike traditional bread recipes that require intensive kneading, these rolls come together with just a simple mix and overnight rise. The long fermentation does all the work, developing gluten naturally while you sleep. Perfect for busy families or anyone intimidated by traditional bread-making techniques.
Unmatched Flavor Development: The extended fermentation creates complex, slightly tangy flavors that rival artisan bakery bread. This slow rise allows enzymes to break down starches into sugars, creating deeper taste profiles impossible to achieve with quick-rise methods.
Foolproof Results Every Time: This forgiving recipe practically guarantees success. The wet dough is nearly impossible to overwork, and the long rise time accommodates busy schedules – you can even extend it up to 48 hours in the refrigerator.
Family-Friendly and Customizable: These homemade rolls adapt beautifully to dietary needs and flavor preferences. The basic recipe serves as a foundation for countless variations, from herb-infused to whole wheat versions.
Cost-Effective Kitchen Staple: Making bread at home costs significantly less than store-bought artisan rolls, and the ingredients are pantry staples you likely already have on hand.
Ingredient Insights & Smart Selection Tips
High-Quality Flour Makes a Difference: Use unbleached all-purpose flour for the best texture and flavor. The protein content (around 10-12%) provides enough structure without making rolls tough. Bread flour works too but may create slightly chewier results. For those avoiding gluten, substitute with a 1:1 gluten-free flour blend, though texture will be slightly different.
Salt Selection Matters: Fine sea salt or kosher salt work best, distributing evenly throughout the dough. Avoid iodized table salt, which can impart a metallic taste during long fermentation. Use about ¾ teaspoon per cup of flour.
Yeast Considerations: Active dry yeast or instant yeast both work perfectly. If using active dry yeast, proof it first in warm water to ensure viability. Store yeast in the refrigerator or freezer to maintain potency longer.
Water Temperature is Critical: Use lukewarm water (around 70-75°F) to encourage slow, steady fermentation. Too hot kills yeast; too cold slows the process significantly. Room temperature water works fine if your kitchen isn’t extremely cold.
Optional Enrichments: A tablespoon of olive oil or melted butter adds richness, while a teaspoon of sugar feeds the yeast for a slightly faster rise and golden color.
Essential Techniques & Method Overview
The Autolyse Advantage: After mixing ingredients, let the dough rest 30 minutes before the first fold. This autolyse period allows flour to fully hydrate and gluten to begin developing naturally, creating better texture with less effort.
Gentle Folding Technique: Instead of kneading, perform a series of gentle folds during the first few hours. Wet your hands, grab one side of the dough, stretch it up, and fold it over itself. Rotate the bowl and repeat 3-4 times. This builds structure while maintaining the dough’s airy texture.
Temperature Control for Timing: Room temperature affects rise time dramatically. In warm kitchens (75°F+), bulk fermentation takes 12-18 hours. Cooler rooms may need 18-24 hours. You can also refrigerate the dough to slow fermentation and develop more complex flavors.
Proper Shaping Without Deflation: When shaping rolls, work gently to preserve the gas bubbles created during fermentation. Use floured hands and minimal pressure, tucking edges underneath to create surface tension without compressing the interior.
Steam for Professional Crust: Create steam during baking by placing a pan of hot water on the oven’s bottom rack. This produces the crispy-outside, tender-inside texture characteristic of artisan bread.
Step-by-Step Instructions
- Mix the Dough (5 minutes): In a large bowl, whisk together 3 cups all-purpose flour, 1¼ teaspoons salt, and ¼ teaspoon active dry yeast. Add 1⅝ cups lukewarm water and stir with a wooden spoon until a shaggy, sticky dough forms. No flour should remain dry. The dough will look rough and messy – this is perfect.
- Initial Rise (30 minutes): Cover bowl with plastic wrap or damp towel. Let rest at room temperature for 30 minutes while flour hydrates and yeast begins working.
- First Fold Series (2 hours): Perform gentle folds every 30 minutes for the first 2 hours. Wet your hands, grab one edge of dough, stretch upward, and fold over center. Rotate bowl 90 degrees and repeat 3 more times. Cover between folds.
- Bulk Fermentation (10-20 hours): After the final fold, cover tightly and let rise at room temperature until tripled in size. Dough should be bubbly, jiggly, and smell slightly yeasty. This takes 12-18 hours in average kitchens.
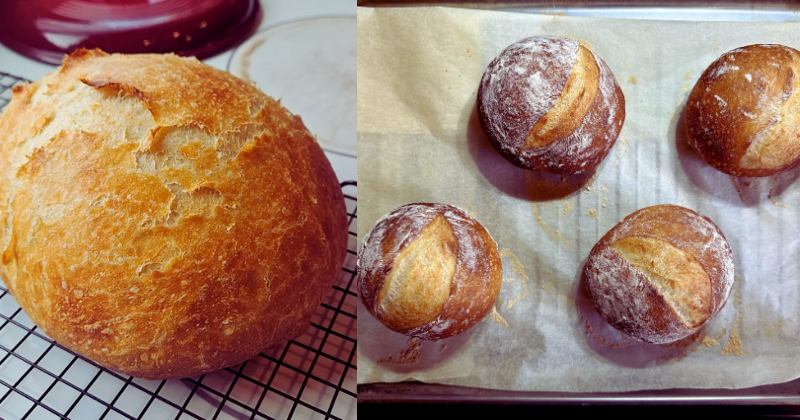
- Shape the Rolls (15 minutes): Turn dough onto well-floured surface. Divide into 12 equal pieces using a bench scraper. With floured hands, gently shape each piece into a ball by tucking edges underneath. Place on parchment-lined baking sheet, seam-side down.
- Final Proof (1-2 hours): Cover rolls loosely with oiled plastic wrap. Let rise until doubled and jiggly when gently shaken. Preheat oven to 450°F during final 30 minutes.
- Bake to Perfection (18-22 minutes): Place water pan on bottom oven rack. Bake rolls until deep golden brown and internal temperature reaches 190°F. Cool on wire rack before serving.
Pro Tips & Troubleshooting Secrets
The Windowpane Test: After bulk fermentation, stretch a small piece of dough. If it forms a translucent “windowpane” without tearing, gluten development is perfect. If it tears immediately, extend fermentation time.
Timing Flexibility: This dough is incredibly forgiving. If life interferes, refrigerate at any point to slow fermentation. Cold dough can be shaped directly from the fridge – just extend final proofing time.
Moisture Management: If your kitchen is very dry, place a damp towel over the covered bowl during fermentation to prevent surface drying. Conversely, in humid conditions, reduce water slightly.
Temperature Rescue: Dough too cold and slow? Place bowl near (not on) a warm stove or radiator. Too warm and fast? Move to the coolest spot in your kitchen or refrigerate briefly.
Shaping Confidence: Sticky dough is good dough in this recipe. Use flour liberally on surfaces and hands, but don’t add extra flour to the dough itself, which would make rolls dense.
Creative Variations & Customizations
Transform basic rolls into flavor sensations with simple additions. For herb rolls, fold in 2 tablespoons chopped fresh rosemary, thyme, or oregano during the first fold series. Garlic lovers can add 3 minced cloves and a tablespoon of olive oil.
Whole wheat versions work beautifully – substitute up to half the all-purpose flour with whole wheat, adding an extra 2-3 tablespoons water to compensate for increased absorption. Sweet variations benefit from 2 tablespoons honey and a beaten egg, creating enriched dinner rolls perfect for holidays.
For dairy-free needs, brush tops with olive oil instead of butter. Gluten-free versions require a 1:1 flour substitute and often benefit from a tablespoon of xanthan gum for better structure.
Storage, Reheating & Make-Ahead Magic
Fresh Storage: Store cooled rolls in airtight containers for up to 3 days at room temperature. For longer storage, wrap individually and freeze for up to 3 months. Thaw at room temperature before reheating.
Reheating Excellence: Refresh day-old rolls by spritzing lightly with water and warming in a 350°F oven for 5-7 minutes. This restores crusty exteriors and soft interiors perfectly.
Make-Ahead Strategy: Shape rolls and refrigerate overnight on the baking sheet, covered tightly. Bring to room temperature and proof 1-2 hours before baking. Alternatively, freeze shaped rolls and bake directly from frozen, adding 5-10 minutes to baking time.
Perfect Pairings & Serving Suggestions
These versatile rolls shine alongside hearty soups, especially tomato basil or butternut squash varieties. Their mild flavor complements bold dishes without competing, making them ideal for holiday dinners or casual weeknight meals.
Classic pairings include herb butter, olive oil with balsamic vinegar, or your favorite jam. For elegant presentations, slice and toast for artisan crostini topped with goat cheese and fig preserves.
Wine enthusiasts will find these rolls pair beautifully with medium-bodied reds or crisp whites, while comfort food lovers can’t go wrong serving them with chili, stew, or roasted chicken dinners.
Your Journey to Bread-Making Confidence Starts Here
These no knead bread rolls prove that exceptional homemade bread doesn’t require professional skills or expensive equipment – just time, patience, and quality ingredients. The forgiving nature of this recipe makes it perfect for building confidence while creating memories around your own kitchen table.
Ready to start your own bread-making tradition? Gather your ingredients tonight, mix the dough, and wake up tomorrow to the incredible aroma of homemade rolls baking in your oven. Your family (and your grandmother’s legacy) will thank you.