Prep Time: 5 minutes | Cook Time: 0 minutes | Total Time: 5 minutes | Difficulty: Beginner | Serves: 2 large glasses
The gentle hum of my mother’s old blender on sweltering summer afternoons is a sound that instantly transports me to childhood. I can still picture myself perched on the kitchen counter, legs swinging, watching her drop perfectly ripe bananas into that avocado-green machine along with scoops of vanilla ice cream and cold milk. The result was pure magic – a banana milkshake so thick and creamy that it required serious commitment from our colorful striped straws. Those moments weren’t just about beating the heat; they were about connection, comfort, and the simple joy of something homemade. Today, I’m sharing the secrets to creating that same perfect homemade banana milkshake that has evolved through years of experimentation, ensuring you can recreate those blissful moments in your own kitchen while creating new memories with the people you love most.
Why You’ll Love This Banana Milkshake Recipe
This easy banana milkshake recipe delivers restaurant-quality results with ingredients you likely already have in your kitchen, making it the perfect spontaneous treat for any occasion. Unlike store-bought versions loaded with artificial flavors and preservatives, this homemade banana milkshake celebrates the pure, natural sweetness of ripe bananas while giving you complete control over every ingredient that goes into your family’s glasses.
The texture achieved through proper technique is absolutely divine – luxuriously thick enough to coat your spoon yet smooth enough to sip effortlessly through a straw. The family-friendly milkshake takes mere minutes to prepare, making it an ideal solution for unexpected guests, after-school snacks, or those moments when you need a quick pick-me-up that feels like a special treat.
Perhaps most importantly, this recipe serves as a fantastic foundation for creativity, allowing you to customize flavors and nutritional content to suit different dietary needs and preferences. The natural potassium and vitamins from fresh bananas make this indulgent treat surprisingly nutritious, while the protein from milk and ice cream provides satisfying staying power that keeps hunger at bay much longer than typical sugary snacks.
Ingredient Insights & Selection for the Best Banana Milkshake
The secret to an exceptional banana milkshake begins with selecting the perfect bananas – you want them spotted and soft, but not mushy or overly brown. Those little brown spots indicate peak sweetness and flavor development, while bananas that are still partially green will create a milkshake that tastes starchy and lacks that distinctive banana essence we’re after.
High-quality vanilla ice cream forms the creamy foundation, though you can experiment with different flavors like French vanilla or even banana ice cream for extra intensity. The milk component offers flexibility – whole milk creates the richest, most luxurious texture, while 2% provides a lighter option, and plant-based alternatives like almond or oat milk work beautifully for dairy-free versions.
Fresh vanilla extract makes a noticeable difference in the overall flavor profile, so invest in pure extract rather than imitation. A pinch of salt might seem unusual, but it enhances all the other flavors and creates a more complex, satisfying taste experience. For those watching sugar intake, the natural sweetness of ripe bananas often eliminates the need for additional sweeteners, though a touch of honey or maple syrup can be added if desired.
Storage considerations matter too – keep bananas at room temperature until they reach that perfect spotted ripeness, then you can refrigerate them to slow further ripening or peel and freeze overripe ones specifically for milkshakes, which actually creates an even thicker final texture.
Key Techniques & Method Overview for Milkshake Mastery
Creating the perfect homemade banana milkshake requires understanding several crucial techniques that separate good milkshakes from extraordinary ones. The first essential skill involves achieving the ideal ingredient temperature balance. While bananas can be at room temperature, your ice cream should be slightly softened – not melted, but soft enough to blend easily without overworking your blender motor.
Blending technique proves absolutely critical for achieving that coveted smooth, creamy texture without unwanted lumps or air bubbles. Start your blender on the lowest speed to break down the banana pieces, then gradually increase to medium-high speed for the final mixing. This prevents the mixture from becoming overly aerated while ensuring complete incorporation of all ingredients.
The layering order in your blender makes a significant difference in blending efficiency and final texture. Always add liquid ingredients first, followed by soft ingredients like bananas, and finish with the firmest components like ice cream. This creates a natural vortex that pulls ingredients down toward the blades for more efficient blending.
Timing is everything when it comes to achieving the perfect consistency – over-blending creates a thin, foamy mixture, while under-blending leaves you with chunks and an uneven texture. Most milkshakes reach perfection within 45-60 seconds of blending, depending on your equipment’s power. Watch for visual cues like the mixture becoming uniformly pale yellow and thick enough to coat the blender sides briefly when the motor stops.
Step-by-Step Instructions for Perfect Banana Milkshake
Step 1: Begin by removing 3-4 scoops of high-quality vanilla ice cream from the freezer and letting it soften slightly at room temperature for 5-10 minutes. Meanwhile, peel 2 large, perfectly ripe bananas and break them into chunks. The bananas should have brown spots but still feel firm when gently squeezed.
Step 2: Add ½ cup of cold whole milk to your blender first, followed by ½ teaspoon of pure vanilla extract and a tiny pinch of salt. The cold milk creates the proper base temperature and helps the blender blades grab ingredients effectively.
Step 3: Add the banana chunks to the blender, distributing them evenly around the bottom. The pieces should be roughly uniform in size to ensure even blending. If your bananas are particularly large, break them into smaller segments.
Step 4: Top with the softened vanilla ice cream scoops, placing them gently on top of the banana pieces. The slightly softened texture should yield easily to gentle pressure but still hold its shape.
Step 5: Secure the blender lid firmly and start blending on the lowest speed for 15-20 seconds to break down the banana pieces. You should hear the motor working steadily without strain, and see the mixture beginning to combine.
Step 6: Gradually increase the blender speed to medium-high and continue blending for another 30-45 seconds until the mixture becomes uniformly smooth and creamy. The finished banana milkshake should be pale yellow, thick enough to coat a spoon, and completely free of lumps.
Step 7: Stop the blender and check consistency by lifting the lid carefully. The mixture should pour slowly and coat the sides of the blender briefly. If it’s too thick, add milk one tablespoon at a time; if too thin, add more ice cream.
Pro Tips & Troubleshooting for Milkshake Success
The secret to professional-quality banana milkshakes lies in these expert techniques I’ve perfected over years of experimentation. Always chill your serving glasses in the freezer for 10-15 minutes before serving – this prevents the milkshake from melting quickly and creates an instantly refreshing experience that feels extra special.
For ultra-thick milkshakes that can support whipped cream and toppings, use frozen banana chunks instead of fresh ones. Simply peel overripe bananas, slice them, and freeze in single layers on baking sheets before transferring to freezer bags. This technique creates an incredibly thick texture while intensifying the banana flavor.
If your milkshake turns out too thin despite following the recipe, the culprit is usually ice cream that was too soft or bananas that were overripe and watery. Fix thin milkshakes by adding more ice cream gradually, or place the entire mixture in the freezer for 10-15 minutes to firm up before serving.
Conversely, if your milkshake is too thick to drink comfortably, resist the urge to add large amounts of milk at once. Instead, add liquid one tablespoon at a time and pulse briefly to incorporate. This prevents the mixture from becoming too thin too quickly.
The most common mistake is over-blending, which incorporates too much air and creates a foamy, less satisfying texture. Stop blending as soon as the mixture looks smooth and uniform – usually within one minute of total blending time.
Variations & Customizations for Every Taste
Transform this basic banana milkshake recipe into countless delicious variations to suit every preference and dietary requirement. For chocolate banana lovers, add 2-3 tablespoons of chocolate syrup or cocoa powder for a rich, indulgent twist. Peanut butter banana milkshakes require just 2 tablespoons of natural peanut butter for a protein-packed treat.
Create dairy-free versions using coconut milk ice cream and oat milk, which provide surprisingly creamy results while accommodating lactose intolerance or vegan diets. For lighter options, substitute frozen yogurt for ice cream and use low-fat milk without sacrificing much flavor or satisfaction.
Seasonal variations keep this recipe exciting year-round – add a pinch of cinnamon and nutmeg for fall warmth, fresh strawberries for summer freshness, or a tablespoon of maple syrup for cozy winter comfort. You can easily double or triple the recipe for parties, or halve it for single servings when you’re craving a personal treat.
Storage, Reheating & Make-Ahead Tips
Fresh banana milkshakes taste best when consumed immediately, but you can store them successfully with proper technique. Pour leftover milkshake into airtight containers and refrigerate for up to 24 hours, though the texture will thicken considerably and may require whisking to restore smoothness.
For make-ahead convenience, prepare pre-portioned freezer bags with banana chunks, then simply add ice cream and milk when ready to blend. This method saves time while ensuring optimal flavor and texture every time.
Frozen banana chunks can be stored in freezer bags for up to 3 months, making this recipe accessible even when fresh bananas aren’t available or are out of season. Label bags with dates to ensure optimal quality and rotate stock regularly.
Serving Suggestions & Perfect Pairings
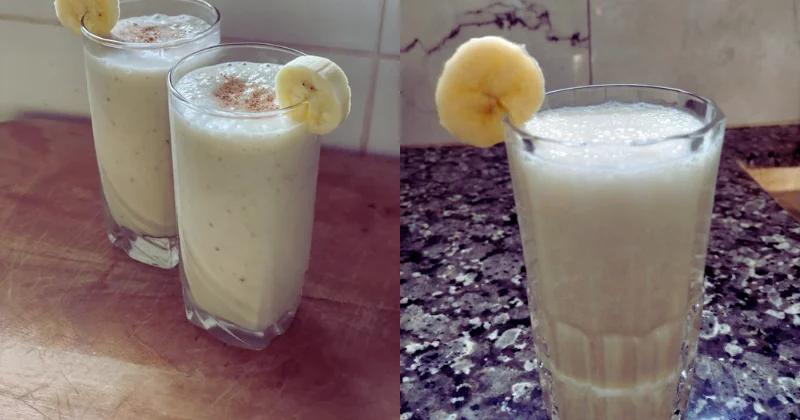
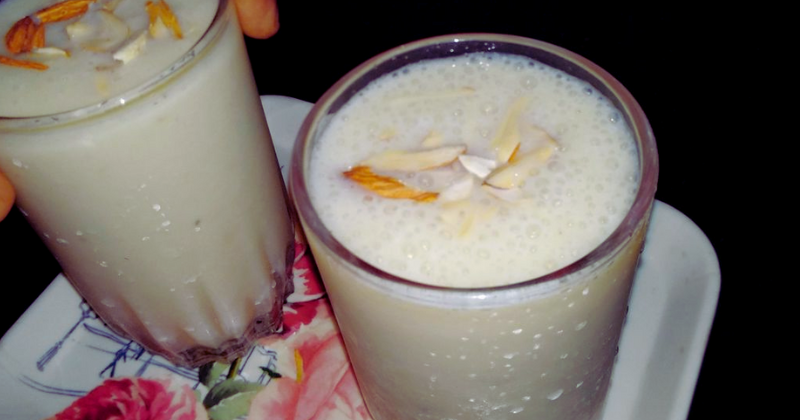
These creamy homemade banana milkshakes shine brightest when served in chilled glasses with thoughtful garnishes that enhance both visual appeal and flavor experience. Classic whipped cream rosettes topped with a maraschino cherry create nostalgic diner vibes, while crushed vanilla wafers or graham crackers add delightful textural contrast.
For more sophisticated presentations, rim glasses with cinnamon sugar or drizzle chocolate syrup down the inside walls before pouring. Fresh banana slices and mint sprigs provide elegant garnishes that hint at the flavors within while adding restaurant-quality visual appeal.
Consider serving alongside complementary treats like chocolate chip cookies, banana bread, or cinnamon rolls for a complete dessert experience. These milkshakes also pair beautifully with breakfast items like pancakes or French toast, creating indulgent weekend brunch spreads.
For special occasions, create a milkshake bar with various toppings, syrups, and mix-ins so guests can customize their perfect banana milkshake. This interactive element transforms a simple drink into memorable entertainment that brings people together around pure, simple pleasure – just like those magical summer afternoons in my mother’s kitchen all those years ago.