Prep Time: 20 minutes | Cook Time: 45 minutes | Total Time: 1 hour 5 minutes | Serves: 8-10 | Difficulty: Easy
Table of Contents
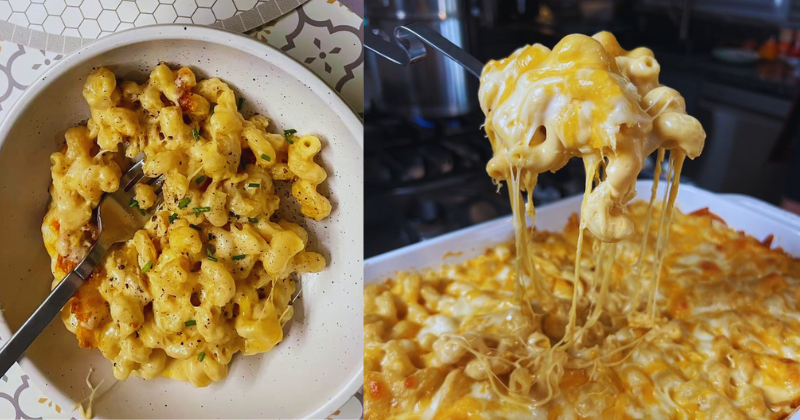
There’s something magical about the moment you pull a bubbling pan of baked mac and cheese from the oven. The golden-brown crust crackles softly as it cools, revealing creamy, molten cheese beneath that stretches in long, satisfying ribbons. This isn’t just any mac and cheese – it’s the kind that transforms ordinary Tuesday nights into something special, the dish that brings families together around the dinner table, and the comfort food that wraps you in a warm hug when you need it most. My grandmother’s secret wasn’t just in her technique; it was in the love she stirred into every batch of this homemade baked mac and cheese recipe that’s been perfected over three generations.
Why You’ll Love This Baked Mac and Cheese Recipe
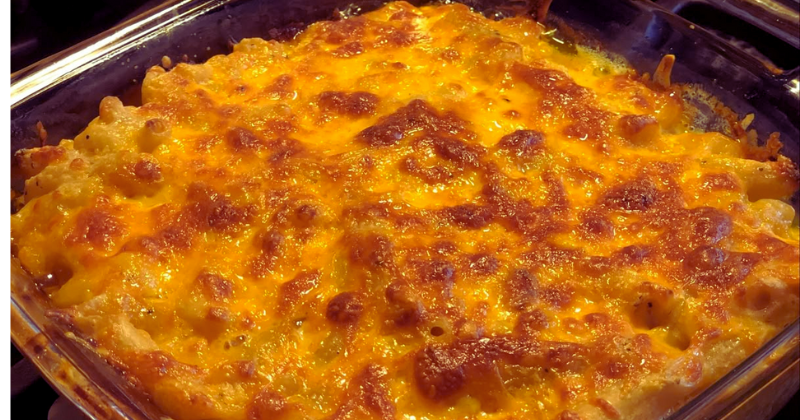
This isn’t your average boxed mac and cheese – this is the real deal that’ll have your family begging for seconds. First, the incredibly creamy texture comes from a perfectly balanced cheese sauce that never breaks or becomes grainy, thanks to a foolproof roux technique that ensures silky smoothness every time. The irresistible golden crust forms naturally during baking, creating a delightful contrast between the crispy top and creamy interior that makes each bite absolutely perfect. This recipe is surprisingly easy and beginner-friendly – no complicated techniques or hard-to-find ingredients required, just simple steps that guarantee success every time. It’s completely family-friendly and kid-approved, making it perfect for busy weeknight dinners, potluck gatherings, or special occasions. Plus, this homemade version is infinitely customizable, allowing you to adjust flavors, add mix-ins, or accommodate dietary preferences while maintaining that classic comfort food appeal that everyone craves.
Ingredient Insights & Smart Selection Tips
The secret to exceptional baked mac and cheese lies in choosing quality ingredients that work together harmoniously. Sharp cheddar cheese forms the flavor foundation – look for aged varieties with bold, tangy notes that won’t disappear during baking. I always grate my own cheese from the block rather than using pre-shredded, which contains anti-caking agents that can prevent smooth melting. Gruyère or fontina adds sophisticated depth and superior melting properties, while cream cheese ensures velvety richness that stays stable during baking. For the pasta, choose elbow macaroni, shells, or cavatappi – shapes with nooks and crannies that capture every drop of cheese sauce. The butter and flour for your roux should be high-quality; European-style butter provides richer flavor, while all-purpose flour creates the perfect thickening base. Whole milk delivers optimal creaminess, though you can substitute with half-and-half for extra richness or use plant-based alternatives for dietary needs. Season with white pepper instead of black to maintain the beautiful golden color, and add a pinch of nutmeg for warmth and complexity that elevates the entire dish.
Essential Techniques & Method Overview
Mastering baked mac and cheese requires understanding four crucial techniques that separate amateur attempts from restaurant-quality results. Creating a proper roux is your foundation – cook equal parts butter and flour over medium heat until the mixture becomes fragrant and slightly golden, whisking constantly to prevent burning. This takes about 2-3 minutes and eliminates the raw flour taste while creating the base for your cheese sauce. Gradual milk incorporation prevents lumps and ensures smoothness – add cold milk slowly while continuously whisking, allowing each addition to fully incorporate before adding more. The mixture should simmer gently until it coats the back of a spoon, indicating proper thickening. Temperature control during cheese addition is critical – remove the pan from heat before stirring in cheese to prevent overheating, which causes proteins to seize and create a grainy texture. Add cheese in handfuls, stirring until completely melted before adding more. Finally, proper pasta preparation means cooking noodles just shy of al dente since they’ll continue cooking in the oven. This prevents mushy results and ensures the perfect tender-but-firm texture in your finished dish.
Step-by-Step Cooking Instructions
1. Preheat your oven to 375°F and generously butter a 9×13-inch baking dish. Cook 1 pound of elbow macaroni in heavily salted boiling water for 1-2 minutes less than package directions suggest – the pasta should still have a slight bite since it will finish cooking in the oven.
2. While pasta cooks, create your cheese sauce by melting 6 tablespoons of butter in a large, heavy-bottomed saucepan over medium heat. Whisk in 6 tablespoons of all-purpose flour, cooking for 2-3 minutes until the mixture smells nutty and turns light golden – this is your roux.
3. Slowly pour in 4 cups of cold whole milk, whisking constantly to prevent lumps. The mixture will seem thin at first but will thicken as it heats. Simmer gently for 5-7 minutes, stirring frequently, until the sauce coats the back of your spoon and you can draw a line through it with your finger.
4. Remove the pan from heat and season with 1 teaspoon salt, ½ teaspoon white pepper, and a pinch of nutmeg. Gradually stir in 3 cups of sharp cheddar cheese and 1 cup of Gruyère, adding one handful at a time until completely melted and smooth. The sauce should be glossy and coat your spoon heavily.
5. Drain the pasta thoroughly and immediately combine it with the cheese sauce, stirring until every piece is beautifully coated. Transfer to your prepared baking dish, spreading evenly, then top with an additional 1 cup of sharp cheddar and ½ cup of Gruyère for that perfect golden crust.
6. Bake for 25-30 minutes until the top is golden brown and bubbling vigorously around the edges. The internal temperature should reach 160°F. Let rest for 10 minutes before serving to allow the sauce to set properly.
Professional Tips & Troubleshooting Secrets
Room temperature ingredients mix more easily – take your cheese, eggs, and dairy out 30 minutes before cooking to prevent temperature shock that can cause sauce separation. Save some pasta water before draining; the starchy liquid can help loosen a too-thick sauce or rescue a broken one. Layer your cheeses strategically by mixing milder cheeses into the sauce and reserving sharper varieties for the top, creating complex flavor development throughout. Avoid overcooking by watching for gentle bubbling around edges rather than violent boiling, which can cause the sauce to break and become oily. The toothpick test works perfectly – insert a toothpick into the center; if it comes out clean with just a few creamy bits clinging, your mac and cheese is perfectly done. If your sauce breaks or becomes grainy, remove it from heat immediately and whisk in a tablespoon of cold cream or milk to bring it back together.
Creative Variations & Dietary Adaptations
Transform your basic recipe with exciting add-ins like crispy bacon bits, caramelized onions, or roasted garlic stirred into the cheese sauce before baking. Create a lobster mac and cheese by folding in chunks of cooked lobster meat, or go vegetarian with roasted butternut squash and sage. For gluten-free versions, substitute rice flour or gluten-free flour blend in equal amounts, and use certified gluten-free pasta. Dairy-free adaptations work beautifully with cashew cream, nutritional yeast, and plant-based butter, while maintaining incredible richness and flavor. Scale the recipe easily – halve all ingredients for a smaller 8×8 pan serving 4-6, or double everything for crowd-feeding using two 9×13 pans.
Storage, Reheating & Make-Ahead Magic
Store leftover baked mac and cheese covered in the refrigerator for up to 4 days. Reheat individual portions in the microwave with a splash of milk to restore creaminess, or warm larger portions in a 350°F oven covered with foil until heated through. Make-ahead preparation is perfect for busy schedules – assemble completely, cover tightly, and refrigerate up to 2 days before baking, adding 10-15 minutes to the original baking time. Freeze portions in airtight containers for up to 3 months; thaw overnight in the refrigerator before reheating. For best results, slightly undercook before freezing to prevent mushy textures after reheating.
Serving Suggestions & Perfect Pairings
Serve this rich, creamy baked mac and cheese alongside simple green salads dressed with vinaigrette to cut through the richness, or pair with roasted vegetables like Brussels sprouts or broccoli for nutritional balance. Crispy breadcrumbs or panko sprinkled on top before baking add textural contrast, while fresh chives or parsley provide color and freshness as garnish. BBQ pulled pork or grilled chicken transform this side dish into a complete meal, while crisp white wines like Chardonnay or Sauvignon Blanc complement the creamy cheese beautifully. For casual entertaining, serve family-style directly from the baking dish with a large spoon and watch it disappear as guests return for seconds and thirds.
Ready to create your own comfort food masterpiece? This baked mac and cheese recipe delivers restaurant-quality results with simple home kitchen techniques. Share your variations and family additions in the comments below – I’d love to hear how you make this recipe your own!