
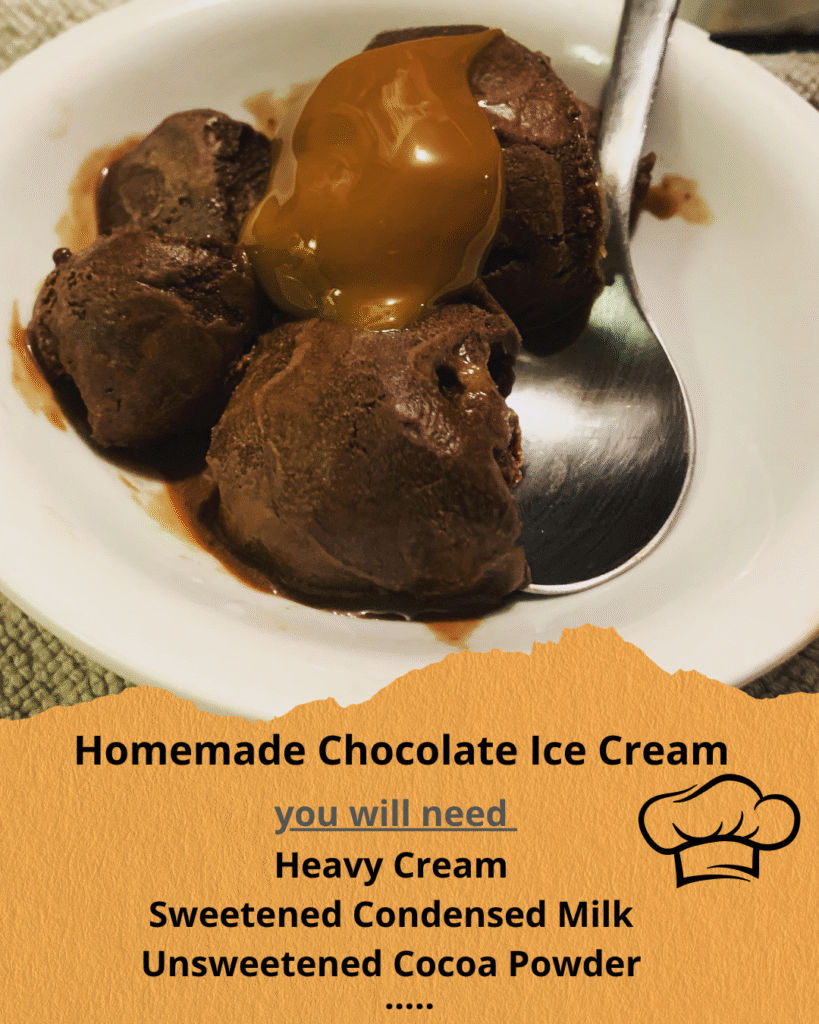
Prep Time: 20 minutes | Chill Time: 4-6 hours | Total Time: 6+ hours | Serves: 6-8 | Difficulty: Easy
Table of Contents
I’ll never forget the summer I turned twelve, standing in my grandmother’s kitchen watching her work magic with nothing more than cream, cocoa, and an old hand-crank ice cream maker. The anticipation was almost unbearable as we took turns churning, the ice and salt creating a symphony of crackling sounds around the metal canister. When we finally lifted that lid and saw the most gorgeous, velvety homemade chocolate ice cream I’d ever laid eyes on, I knew I was witnessing something special. That first spoonful was pure heaven – so much richer and more complex than anything from the freezer aisle. Today, I’m sharing that same time-tested recipe with modern techniques that’ll have you creating restaurant-quality chocolate ice cream right in your own kitchen.
Why You’ll Love This Homemade Chocolate Ice Cream Recipe
This isn’t just another ice cream recipe – it’s your ticket to frozen dessert perfection. First, you’ll save a significant amount of money compared to premium store-bought brands while creating something infinitely more delicious. The homemade chocolate ice cream texture is incredibly smooth and scoopable, thanks to the perfect balance of cream, milk, and egg yolks that creates a custard base. Unlike commercial varieties loaded with stabilizers and artificial flavors, this recipe uses real chocolate and pure vanilla for an authentic, intense chocolate flavor that actually tastes like chocolate. Plus, it’s surprisingly easy to make – no fancy equipment required beyond a basic ice cream maker. The best part? You control every ingredient, making it perfect for families who want to avoid unnecessary additives while creating lasting memories together in the kitchen.
Ingredient Insights & Selection Guide
The secret to exceptional homemade chocolate ice cream lies in choosing quality ingredients that work harmoniously together. Heavy cream forms the luxurious foundation – look for cream with at least 35% fat content for the richest results. Whole milk balances the richness while maintaining creaminess, though you can substitute with 2% milk if needed. Fresh egg yolks are crucial for the custard base that gives this ice cream its signature smoothness; always use the freshest eggs possible and store them properly. For chocolate, I recommend using high-quality unsweetened cocoa powder (Dutch-processed works beautifully) combined with dark chocolate chips or chopped chocolate for depth. Pure vanilla extract makes a noticeable difference over imitation – it’s worth the investment. Sugar can be adjusted to taste, and superfine sugar dissolves more easily than regular granulated. For dietary adaptations, coconut cream can replace heavy cream for dairy-free versions, though the texture will be slightly different. Store chocolate and cocoa in cool, dry places, and remember that fresher dairy products always yield better results.
Key Techniques & Method Overview
Creating perfect chocolate ice cream requires mastering a few essential techniques that transform simple ingredients into frozen perfection. The custard base technique is fundamental – this involves slowly heating cream and milk while carefully tempering egg yolks to create a smooth, thickened base without scrambling the eggs. Temperature control is absolutely critical throughout this process; you’ll want to heat the mixture to exactly 170°F (77°C) to achieve proper thickening. The chocolate incorporation method requires patience – gradually whisking melted chocolate or cocoa into the warm custard ensures smooth integration without seizing. Proper chilling is equally important; your custard base must be completely cold before churning, typically requiring 4-6 hours or overnight refrigeration. The churning technique itself varies by machine, but generally takes 20-25 minutes until the mixture reaches a soft-serve consistency. Understanding these timing elements and visual cues – like when the custard coats the back of a spoon or when the churned ice cream pulls away from the sides – will guarantee consistently excellent results every time you make this recipe.
Step-by-Step Instructions
Step 1: Begin by heating 2 cups heavy cream and 1 cup whole milk in a heavy-bottomed saucepan over medium heat until small bubbles form around the edges (about 5 minutes). Meanwhile, whisk 6 large egg yolks with ¾ cup sugar in a separate bowl until pale and thick, approximately 3 minutes of vigorous whisking.
Step 2: When the cream mixture is hot but not boiling, slowly drizzle about ½ cup into the egg yolk mixture while whisking constantly – this tempering process prevents the eggs from scrambling. Continue adding the hot cream gradually, whisking continuously until fully combined.
Step 3: Return the entire mixture to the saucepan and cook over medium-low heat, stirring constantly with a wooden spoon or heat-proof spatula. Heat until the mixture reaches 170°F and coats the back of your spoon (when you run your finger across the spoon, it should leave a clear line). This typically takes 8-10 minutes.
Step 4: Remove from heat and immediately whisk in ¾ cup unsweetened cocoa powder and 4 ounces melted dark chocolate until completely smooth. The mixture should be glossy and deeply chocolate-colored. Stir in 2 teaspoons pure vanilla extract and a pinch of salt.
Step 5: Strain the custard through a fine-mesh sieve to remove any lumps, then cover with plastic wrap pressed directly onto the surface to prevent a skin from forming. Refrigerate for at least 4 hours or overnight until completely chilled.
Step 6: Churn the cold custard in your ice cream maker according to manufacturer’s instructions, typically 20-25 minutes until it reaches soft-serve consistency. Transfer to an airtight container and freeze for at least 2 hours before serving for the perfect scooping texture.
Pro Tips & Troubleshooting Secrets
Temperature precision is your best friend when making homemade chocolate ice cream – invest in an instant-read thermometer to avoid overcooking the custard base. If you accidentally scramble the eggs, immediately strain the mixture through a fine sieve and whisk vigorously; sometimes you can save it. For ultra-smooth results, blend the finished custard with an immersion blender before chilling to eliminate any remaining lumps. The secret to preventing ice crystals is ensuring your custard is completely cold before churning and working quickly when transferring to storage containers. If your ice cream turns out too hard after freezing, let it sit at room temperature for 10-15 minutes before scooping, or add an extra tablespoon of alcohol (like vanilla extract) to the base for a softer texture. For richer flavor, steep the cream with chocolate for 30 minutes before making the custard, then strain and proceed with the recipe.
Variations & Customizations
Transform this basic chocolate ice cream into exciting flavor adventures with simple modifications. Create mint chocolate chip by adding 1 teaspoon peppermint extract and folding in chocolate chips during the last 5 minutes of churning. For chocolate peanut butter swirl, ripple in warmed peanut butter during the final churning stage. Double chocolate lovers can fold in chocolate chunks or brownie pieces for added texture. Make it dairy-free by substituting coconut cream and non-dairy milk, though you’ll need to add a stabilizer like cornstarch. Reduce sugar by 25% and add natural sweeteners like maple syrup for a healthier version. For smaller batches, simply halve all ingredients and adjust churning time accordingly.
Storage, Reheating & Make-Ahead Tips
Store your homemade chocolate ice cream in an airtight container with plastic wrap pressed directly onto the surface to prevent ice crystals from forming. It’ll maintain peak quality for up to one month in the freezer, though it’s best enjoyed within the first week. The custard base can be made up to 3 days ahead and stored in the refrigerator before churning. For optimal texture, remove from freezer 10-15 minutes before serving to allow slight softening. Never refreeze melted ice cream, as this creates an icy texture. If the ice cream becomes too hard, you can soften it slightly in the refrigerator for 20-30 minutes rather than at room temperature.
Serving Suggestions & Pairings
Serve this decadent chocolate ice cream in chilled bowls with warm brownies for the ultimate contrast of temperatures and textures. Classic toppings include hot fudge sauce, whipped cream, and maraschino cherries for a traditional sundae experience. For elegant dinner parties, pair with fresh berries and a drizzle of raspberry coulis. Create an adult treat by serving alongside espresso or pairing with a rich red wine like Port. During summer months, sandwich between homemade cookies for ice cream sandwiches, or serve in waffle cones with a variety of sprinkles and nuts for a fun family dessert bar.
Ready to create the most incredible homemade chocolate ice cream you’ve ever tasted? Gather your ingredients, dust off that ice cream maker, and prepare for the most rewarding dessert adventure of your summer. Your family will be talking about this creamy, dreamy treat for years to come!